Happy new year to all my followers and crafty friends. Hope you have a Happy craftin 2012. I will be celebrating my 1 year blogiversary in January so stay tuned. 

Saturday, December 31, 2011
Frosted Design Sketch Challenge
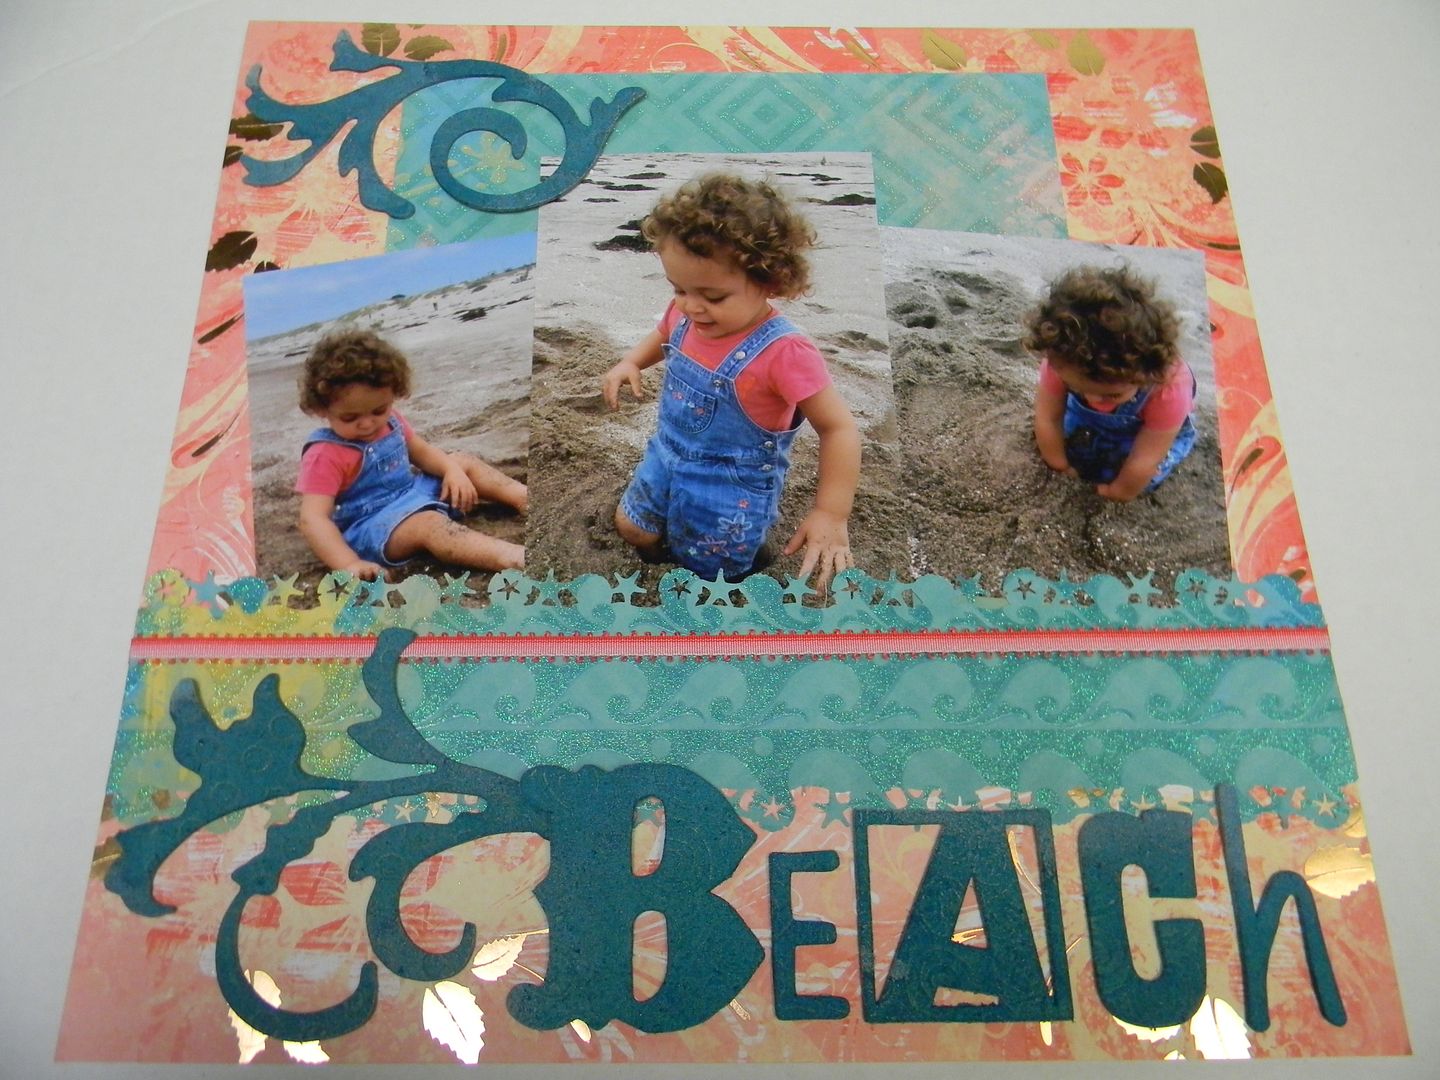
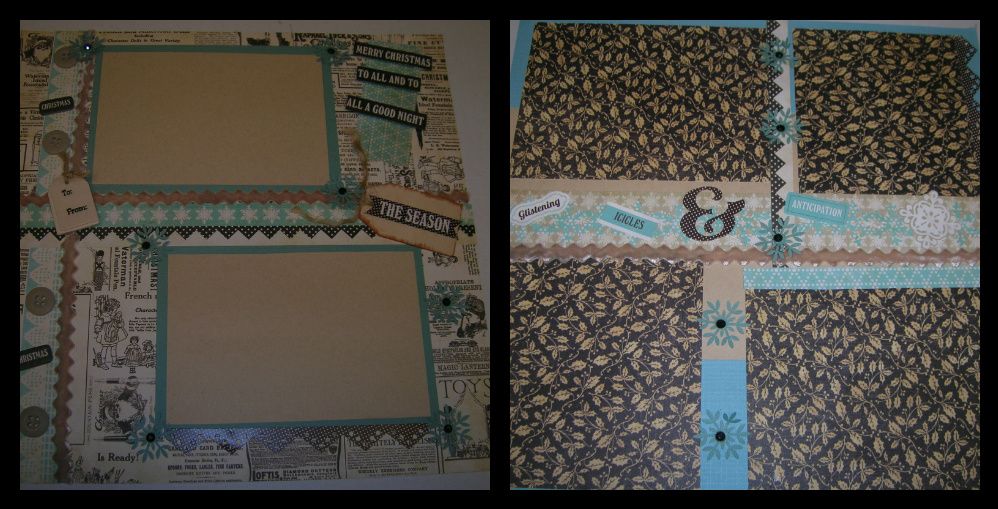
Frosted Designs is one of the blogs that keeps me scrapping pages of my granddaughters. I spent some time organizing photos today and used the sketch below for the first page of my double page layout. These are pics of my oldest granddaughter Katie playing at the beach. I used tropical paper and ribbon from my stash. I choose these for the beach feel as well as bringing out the coral and blue of my granddaughters clothes. I used my MS sand dollar starfish punch and Tim Holtz chipboard for the letters and flourishes. The flourish was actually one large one and I cut it to fit. I took advantage of the gold shiny leaves on the paper and glued the pieces so it looked like the leaves were coming from the flourishes. Cool huh?
By the way I am using my new camera I got for Christmas and I love it!
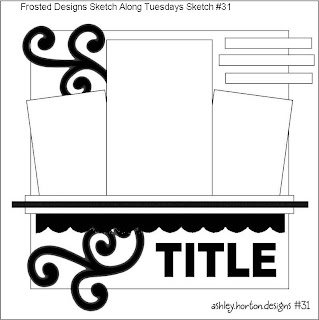
So here is the wonderful sketch.
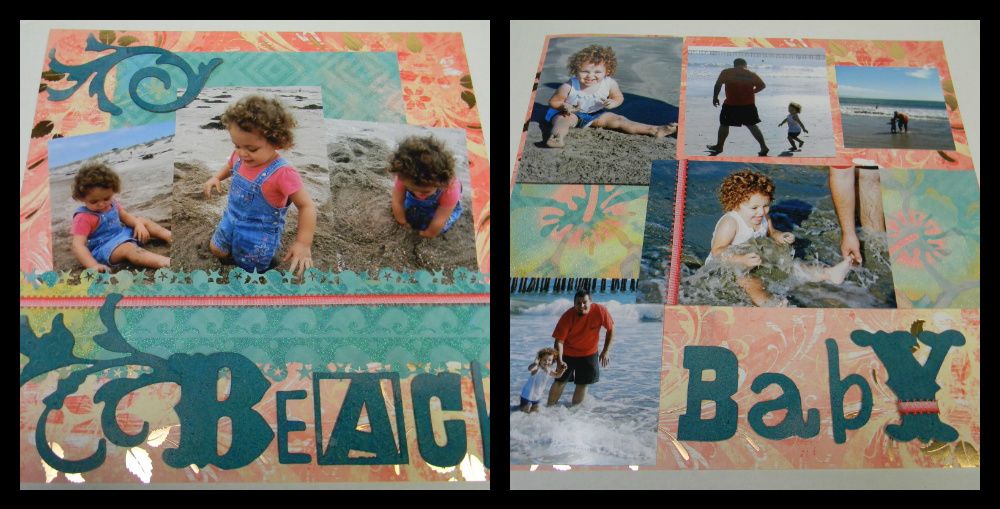
Now I do double page layouts so here are the two pages together.
Closeup of title.

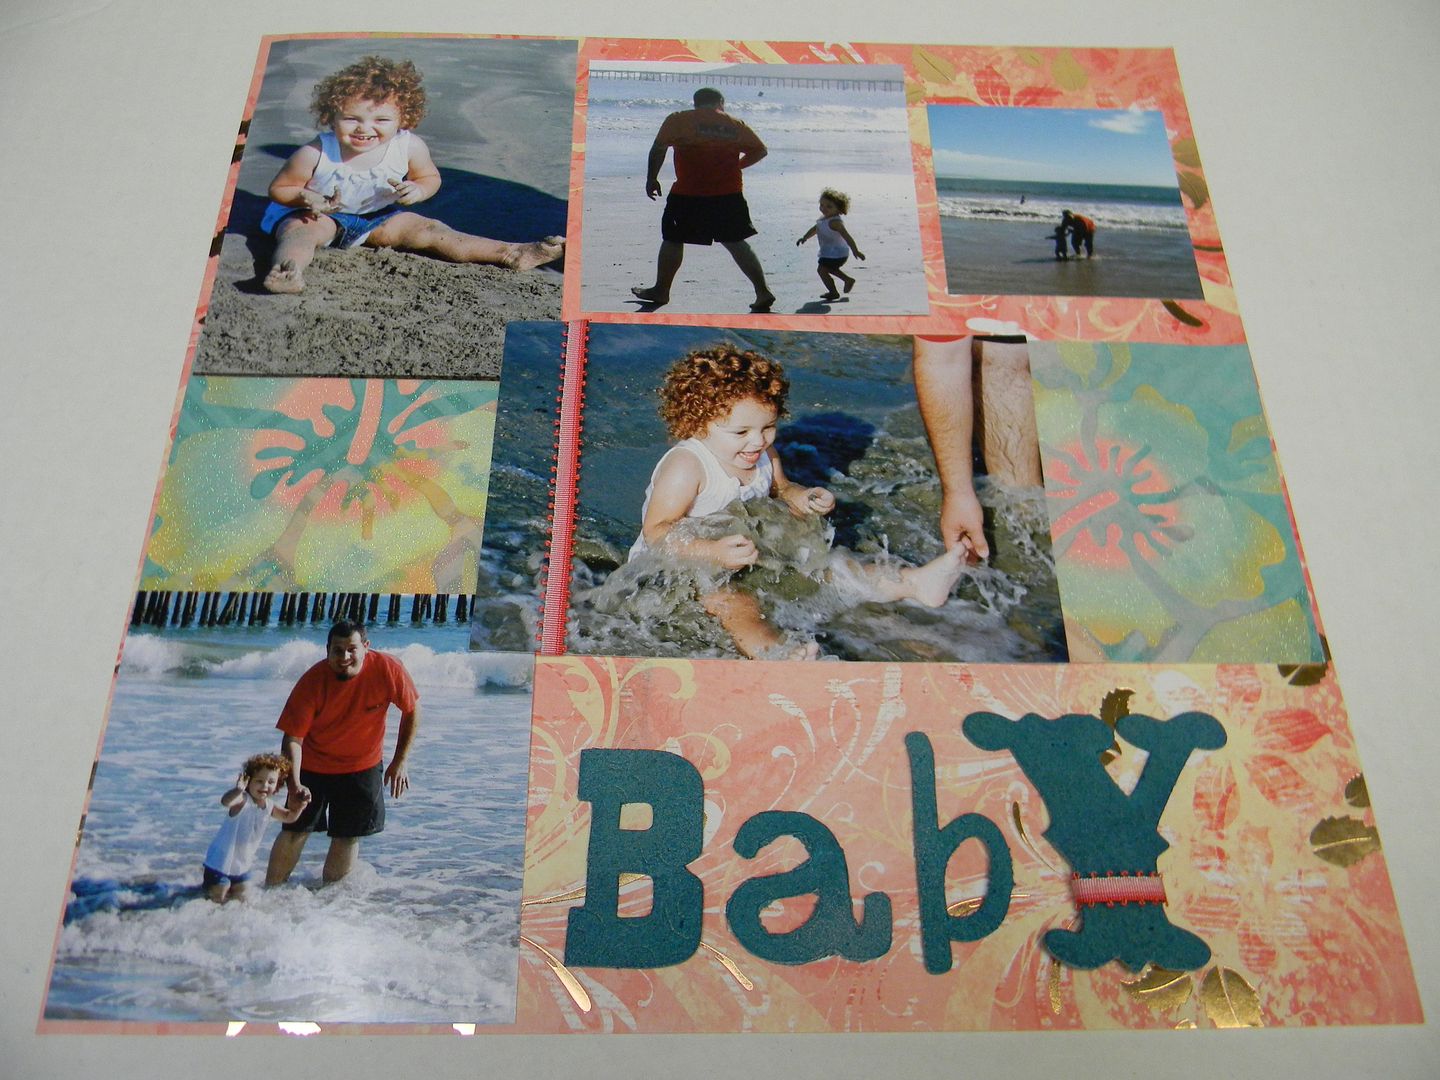
The second page. I added ribbon to Y and focus picture to give a little pop. The teal pieces on each side of the center pic are scrap pieces from the same stack to bring in the teal into this page.
Friday, December 30, 2011
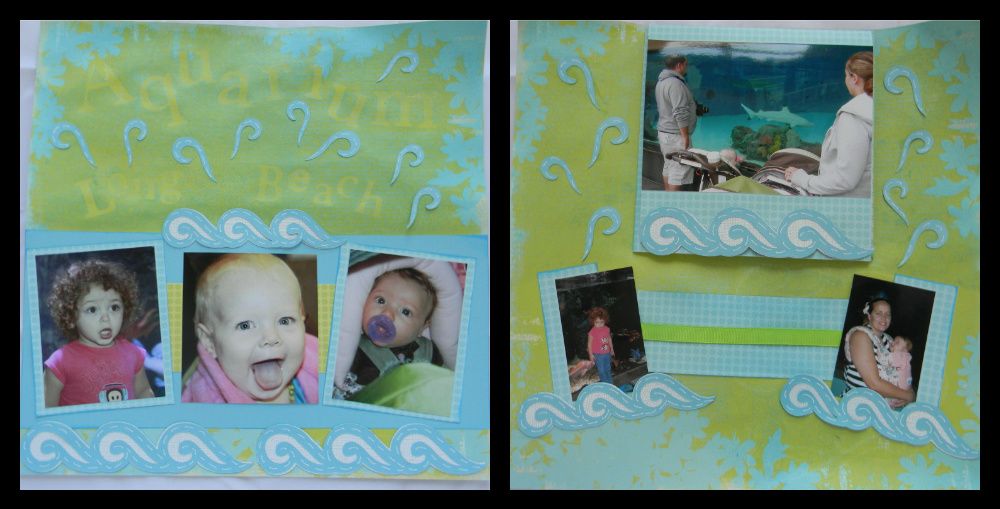
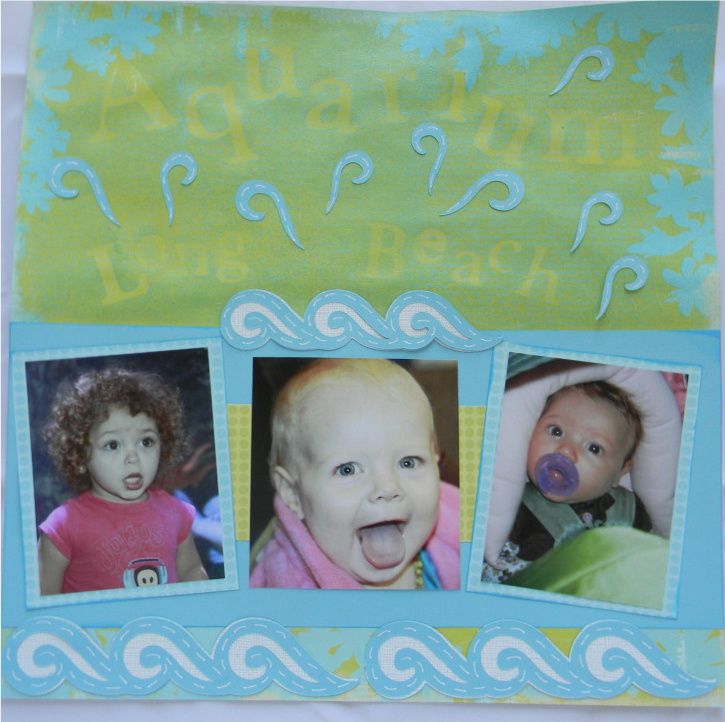
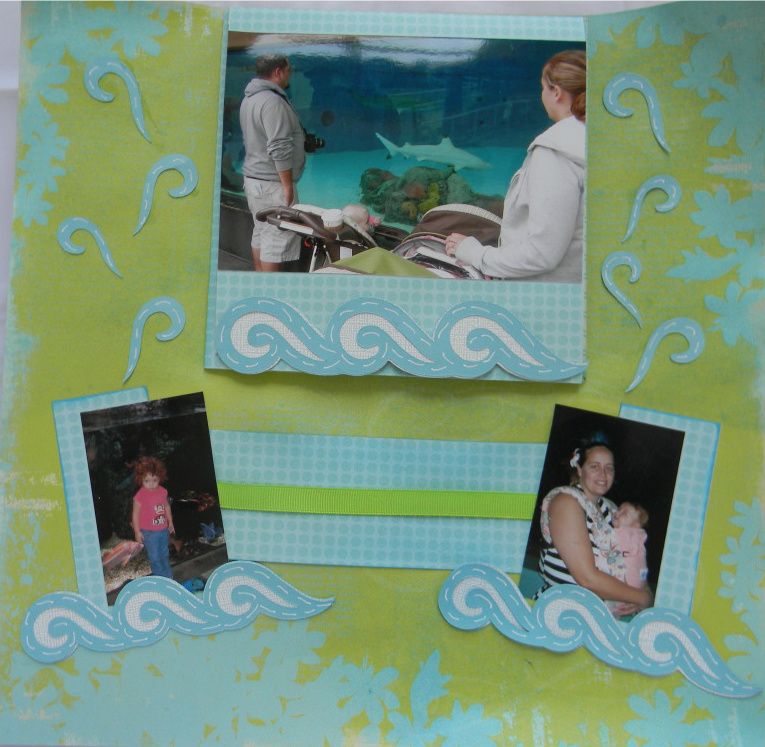
Long Beach Aquarium Hidden picture layout with Quick Quotes
Here is another double page layout that I did of our family trip to the Long Beach Aquarium in November. The first one I posted yesterday if you missed it. I used Quick Quotes paper Savvy Davvy. The blue around the edges reminded me of water.
Here is the link for the paper.
Here is the double page layout.
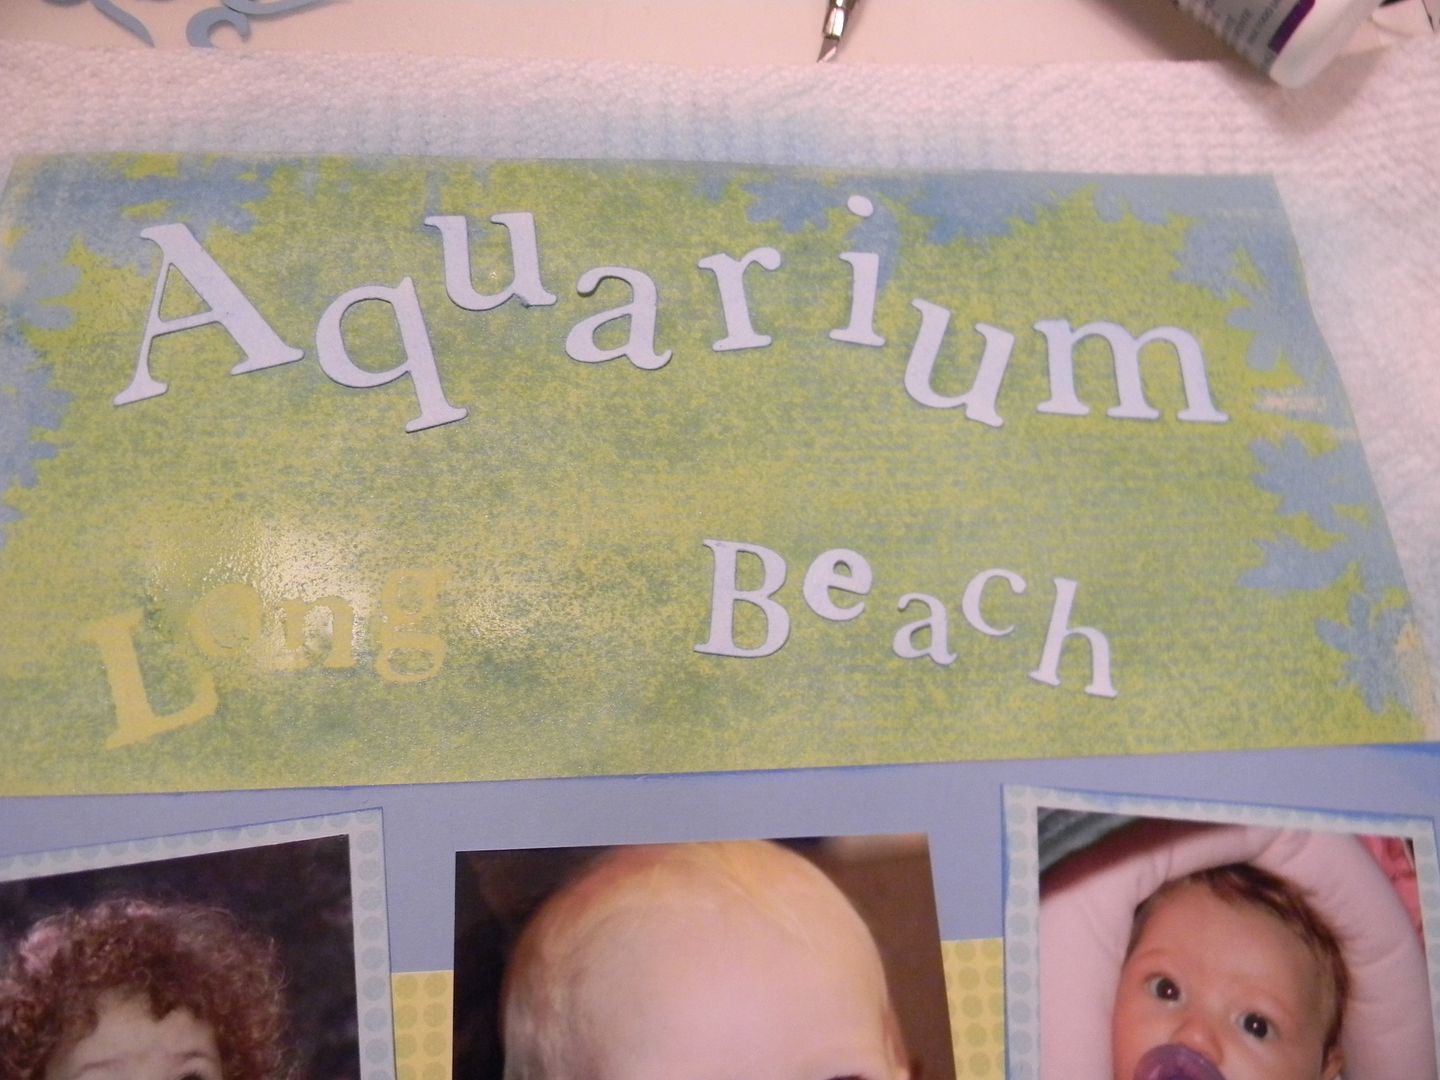
I tried something new for the title.
I cut out the words Aquarium and Long Beach using my Cricut and used adhesive spray that is repositionable on lay the letters down flat. I then sprayed over them with Meadow Green Glimmer Mist. This left the shadow for the title when the letters were removed. This was a new technique for me and I really like the way it looks.
Here is the left side. I also cut out waves from the Cricut Cart Cake Basics and used the inside pieces to make it look like water is splashing up.
These are my girls from left to right.
Katei 22 months, Kenzie 12 months and Brittany (Katie's sister) 4 months.
On the right side I used a hidden picture technique I learned at a Quick Quotes class to add extra pages.
To make the booklet you cut two pieces of 12 x 12 paper in 1/2 and then fold in 1/2.
The fold is glued at the top of the page, then another on top to the left, the next to the right and the last to the bottom. Then it folds shut.
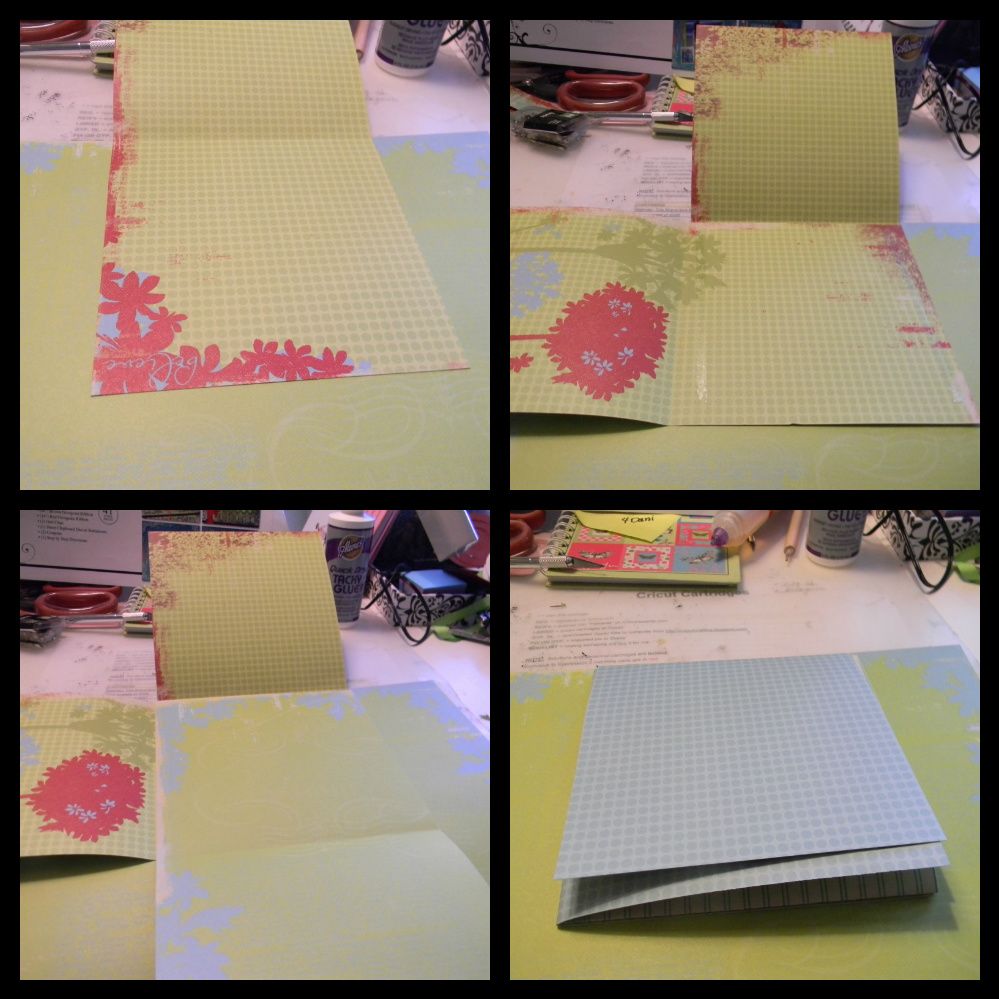
Here is folds with pictures.
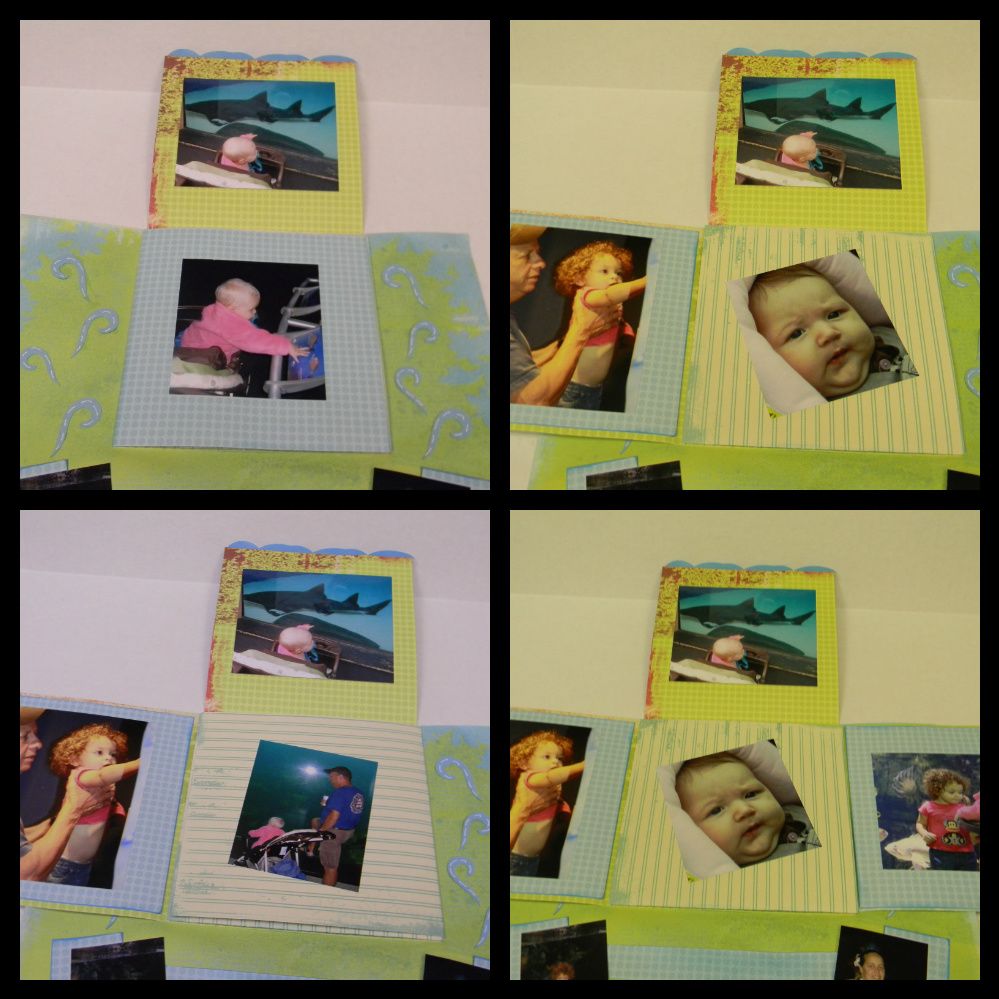
When it is all open I can write my journaling on the inside square. That makes a total of 10 pictures on one page.

I am entering this in the Frosted Designs Try something new- since I tried a new technique for the title spraying the letters and then removing them from the paper.
Thursday, December 29, 2011
Hidden picture layout with Quick Quotes paper
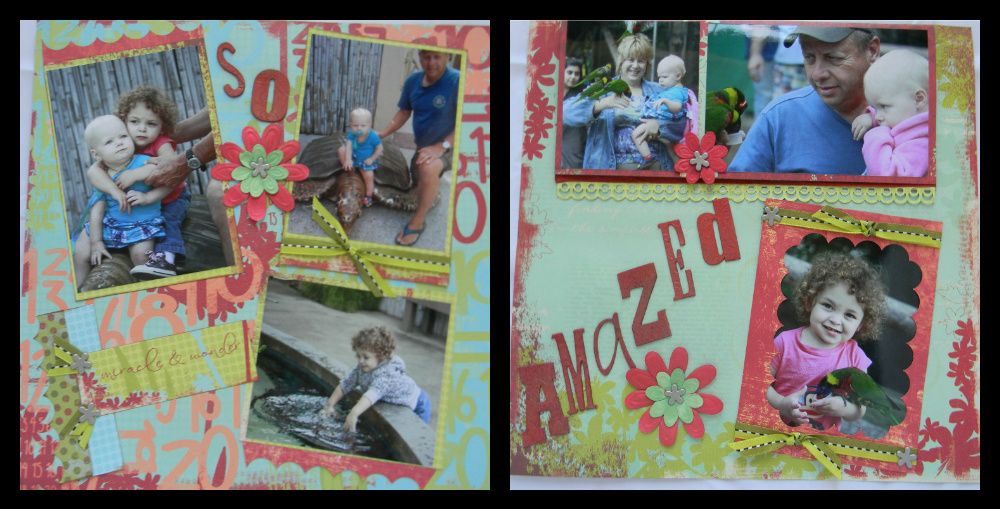
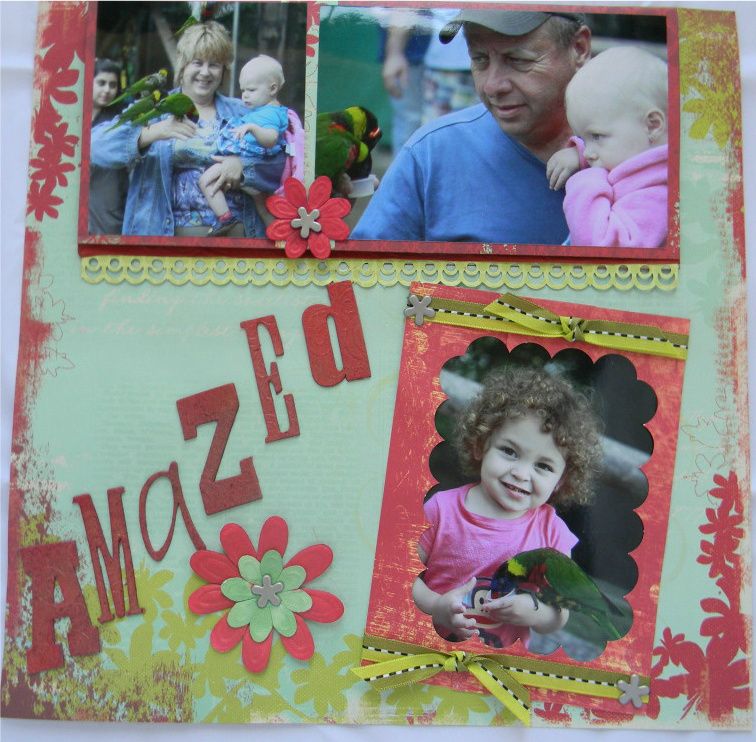
I was so thrilled to get to sit down the last few days and scrap some pics of my granddaughters. My husband and I went to the Long Beach Aquarium in November with our 3 granddaughters and one daughter and her husband. We had a great day, got some great pictures and the two older girls really enjoyed the fish and the Lorakeets. I knew the Savvy Davvy Quick Quotes paper I recently bought would be perfect for these pics with their bright colors.
Link to paper
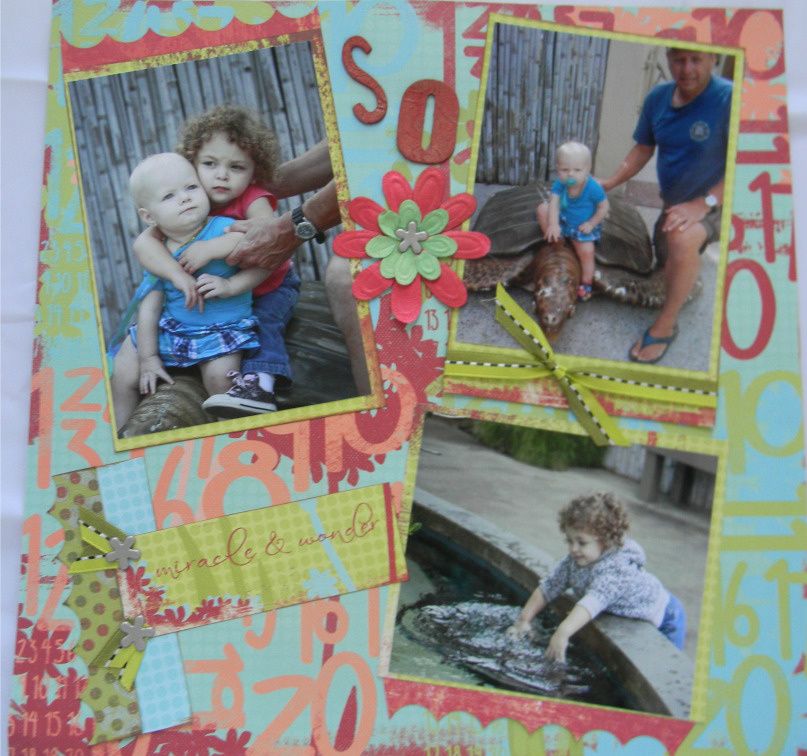
On the left I used the quote on the paper "miracle and wonder" which was perfect. The "So Amazed" is Tim Holtz Chipboard sprayed with Tattered Angels Glimmer Mist Candy Apple Red. I also used the Glimmer Mist on white flowers to match the colors of the paper. The frame around the picture on the right was cut and glued together to fit the picture. These were some scraps I had from a Quick Quotes class I took. The ribbon is from Michaels.
On the right side I used a technique I learned in the Quick Quotes class. I cut a piece at 10" x 9" and folded it in 1/2 to make a booklet. This is glued t the top so the protective layout cover can still go over all but the flap. The green strip was an MS punch. I also used some flower brads from my stash.
This is booklet or flap closed.
This is flap open for four more pictures. Sorry the picture color is so weird. I am learning to use my new camera that I got for Christmas. LOL
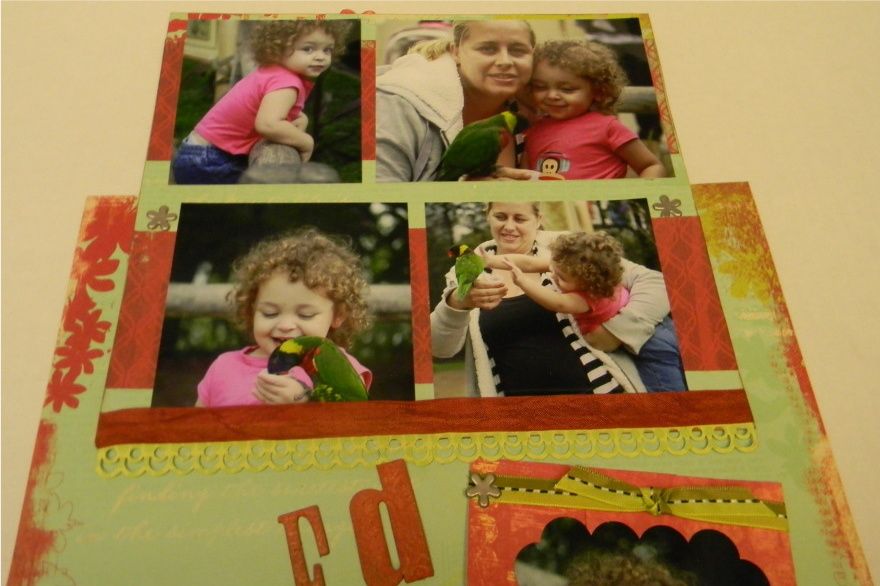
I am still amazed how much the girls loved the birds and they had so much fun feeding them.
I am entering this in the Paper Issues Challenge "We've Got Your Number" since this paper has numbers all over it and the More Than Favors Linking Party.
Monday, December 26, 2011
Sweet Sassy Diva- Thanks for the Gift week of 12/25
Merry Christmas and Happy Holidays to all. This week at Sweet Sassy Diva we were asked to come up with a thank you card. I actually made two cards both with my Imagine.
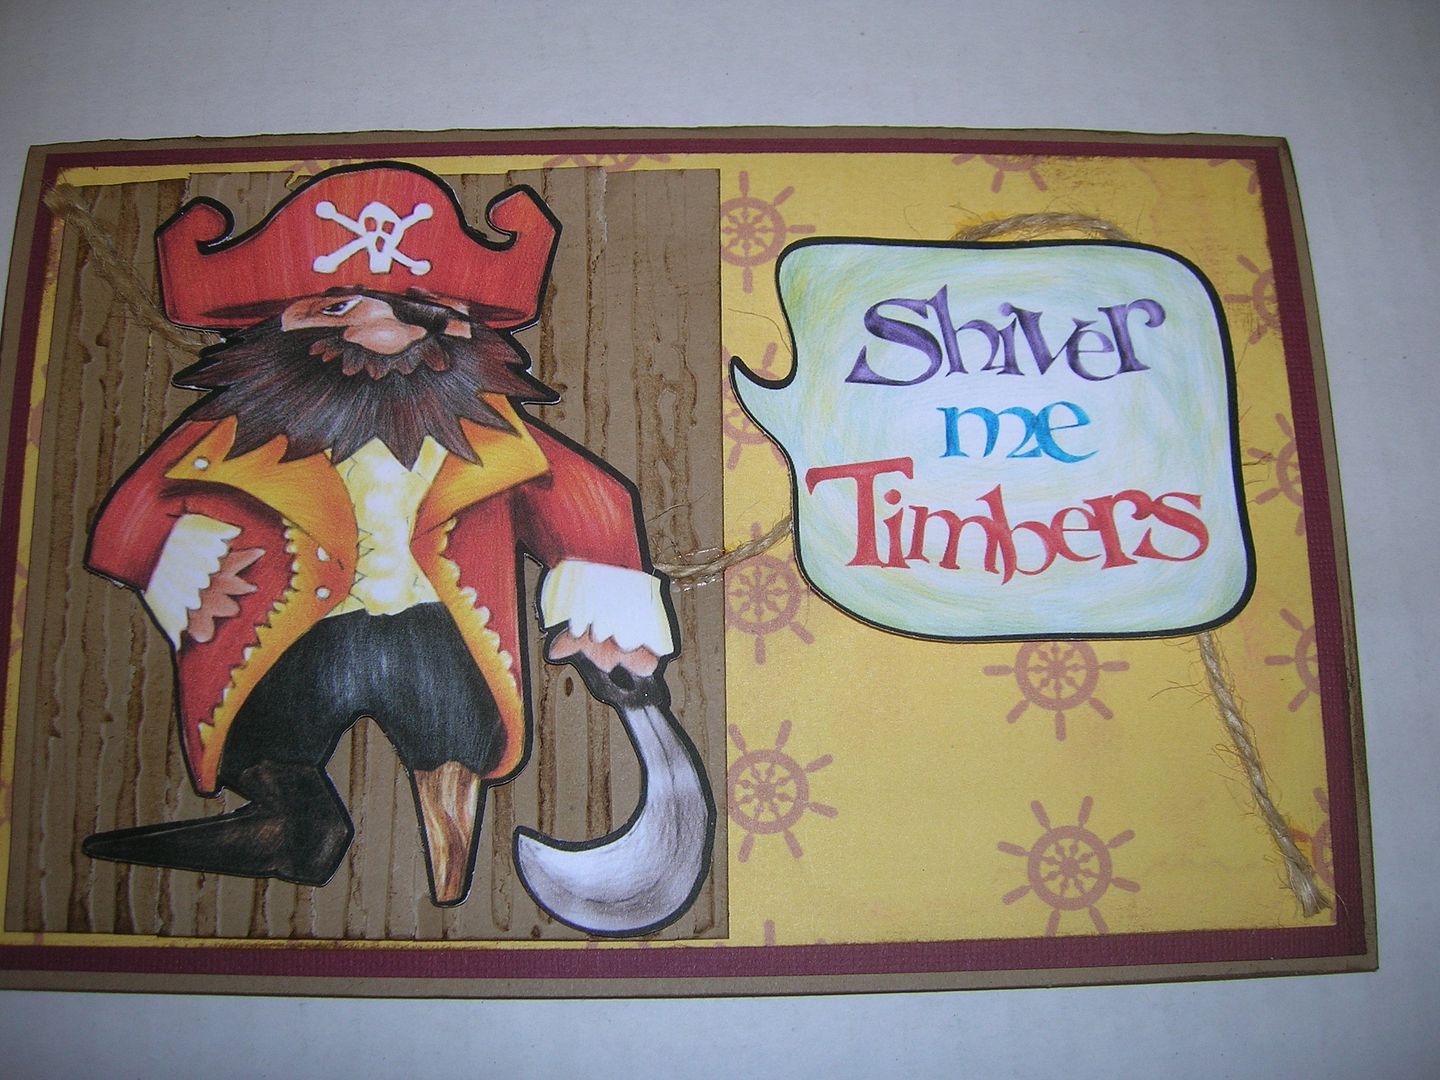
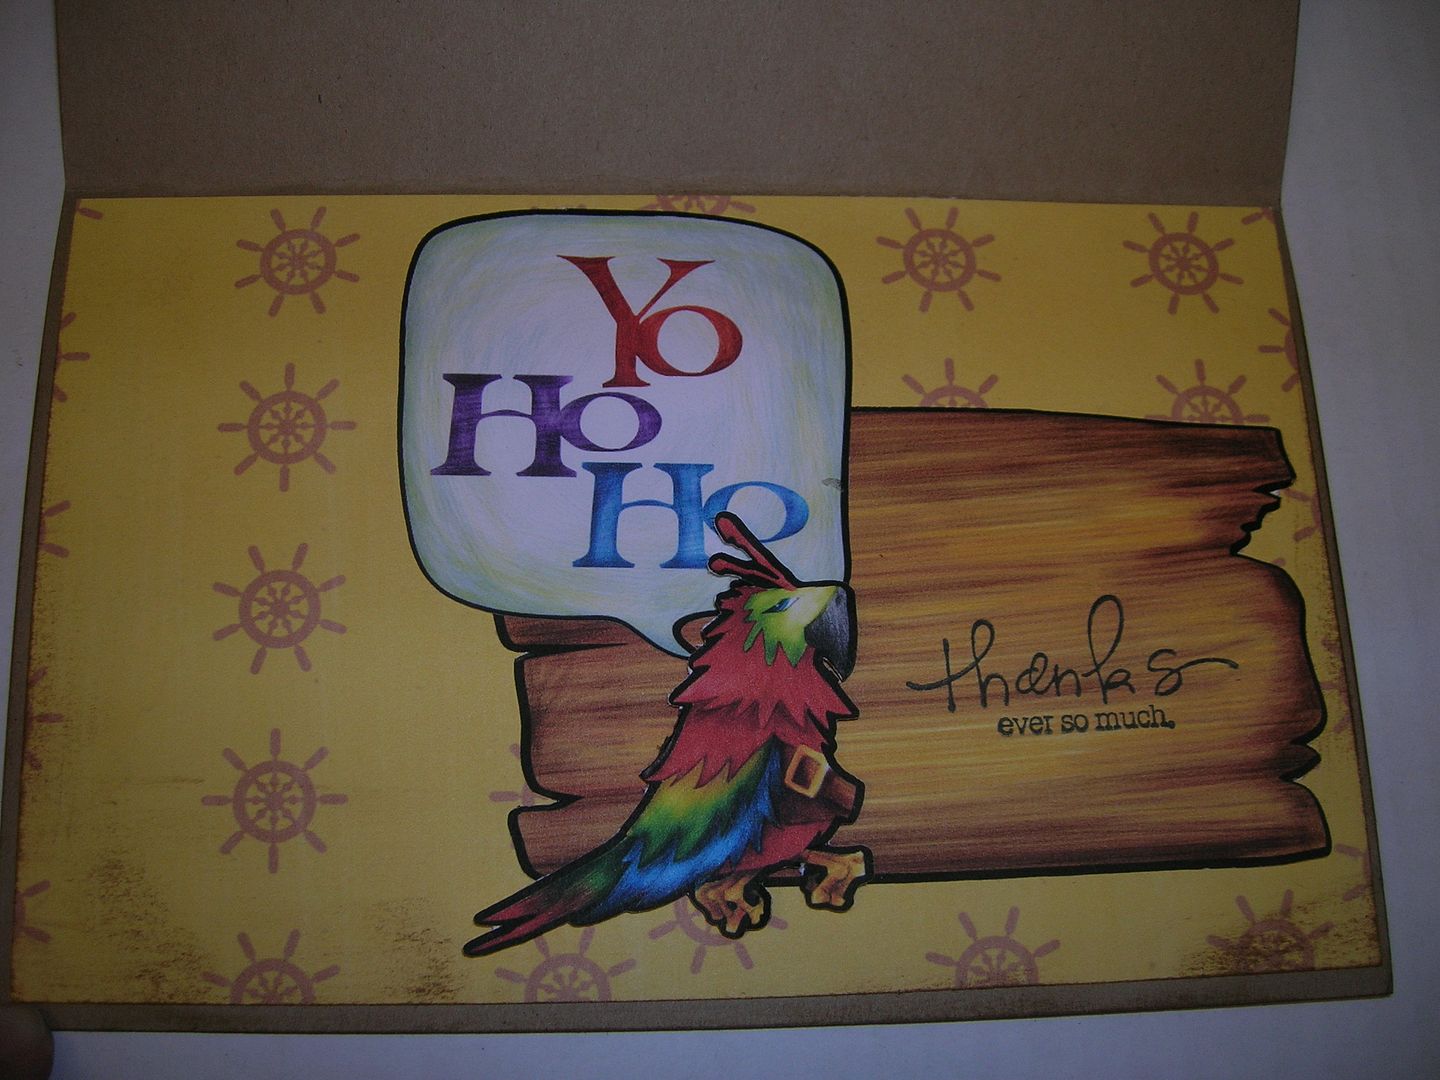
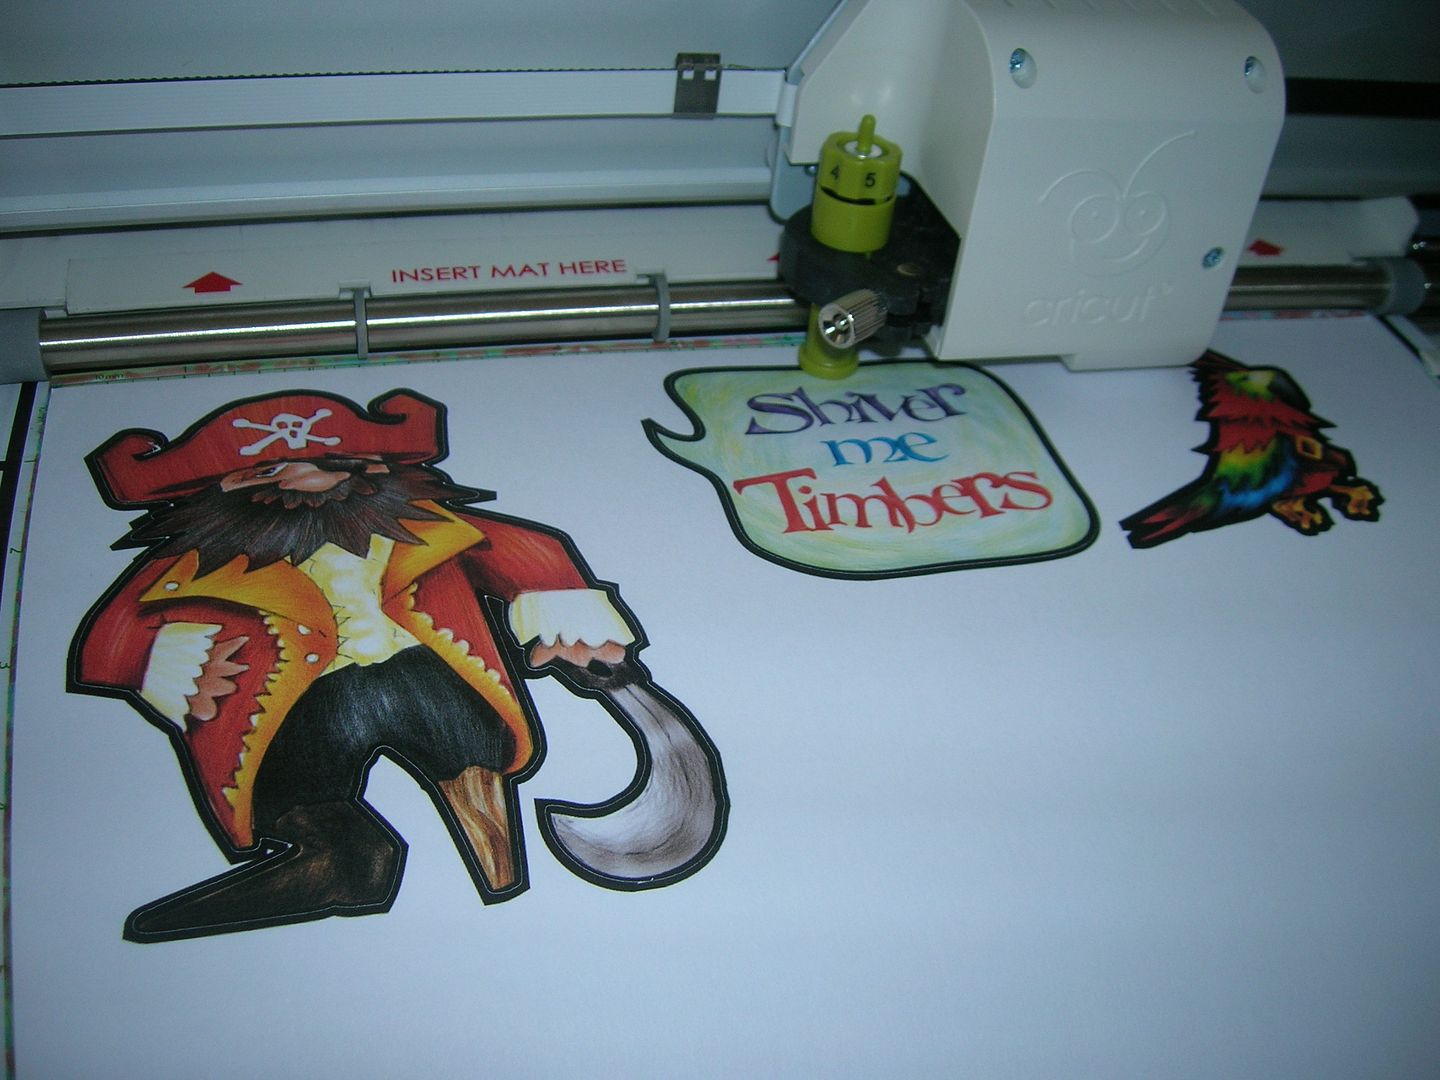
The first is from the Bucaneer cart.
Choosing cuts on Imagine
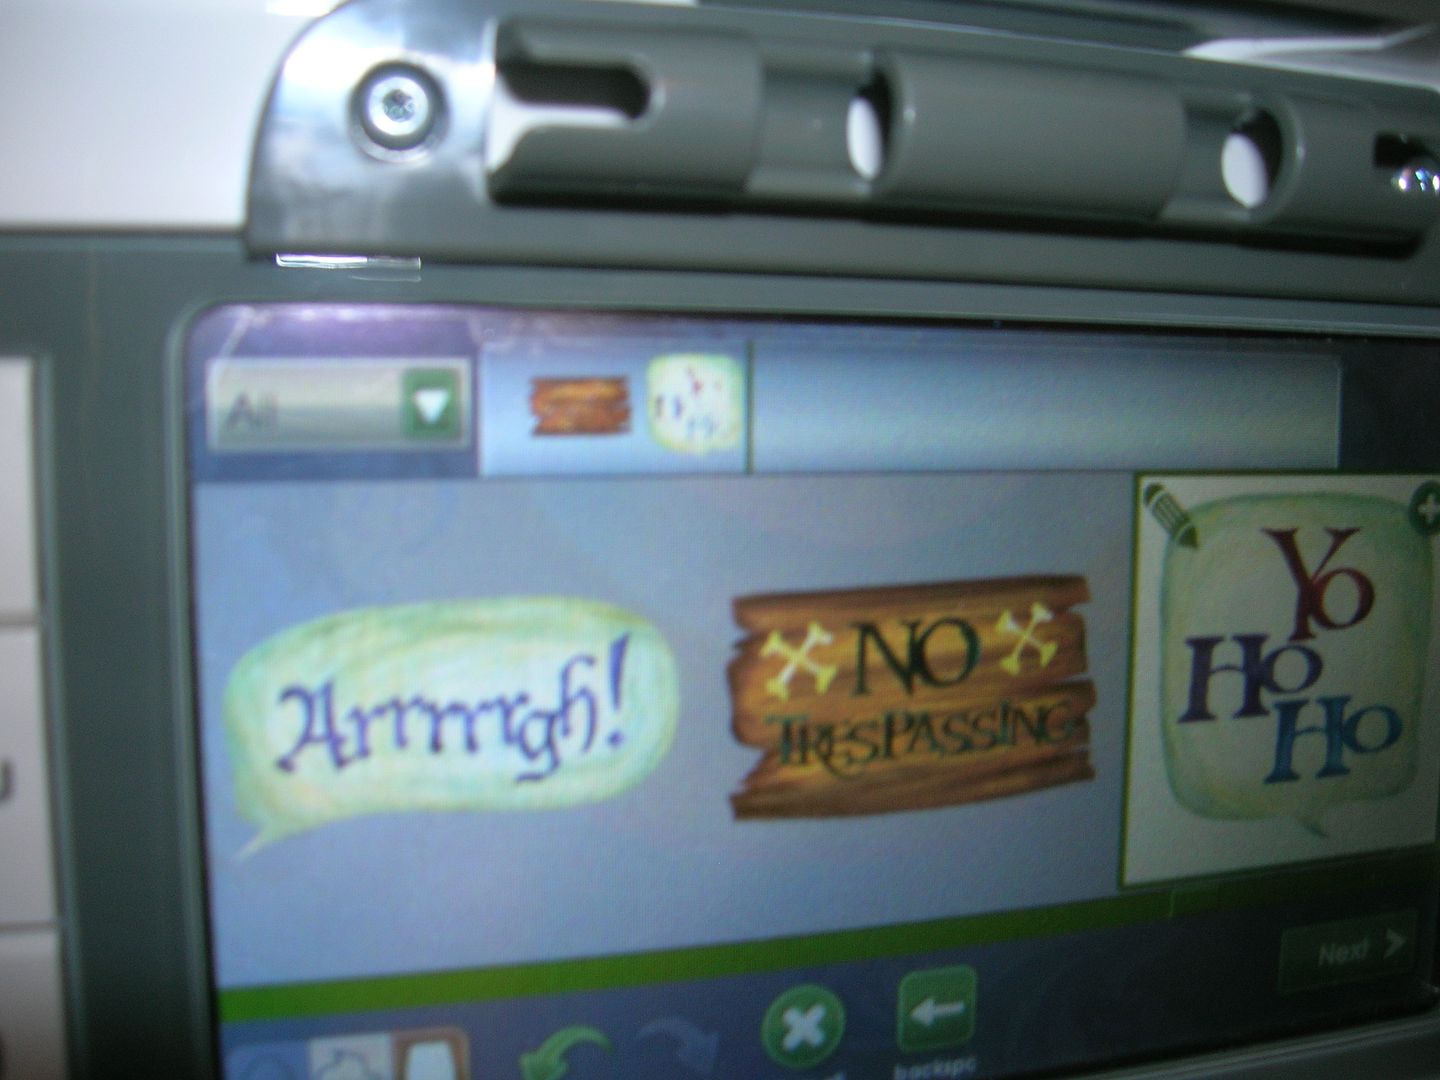
Printed and now cutting
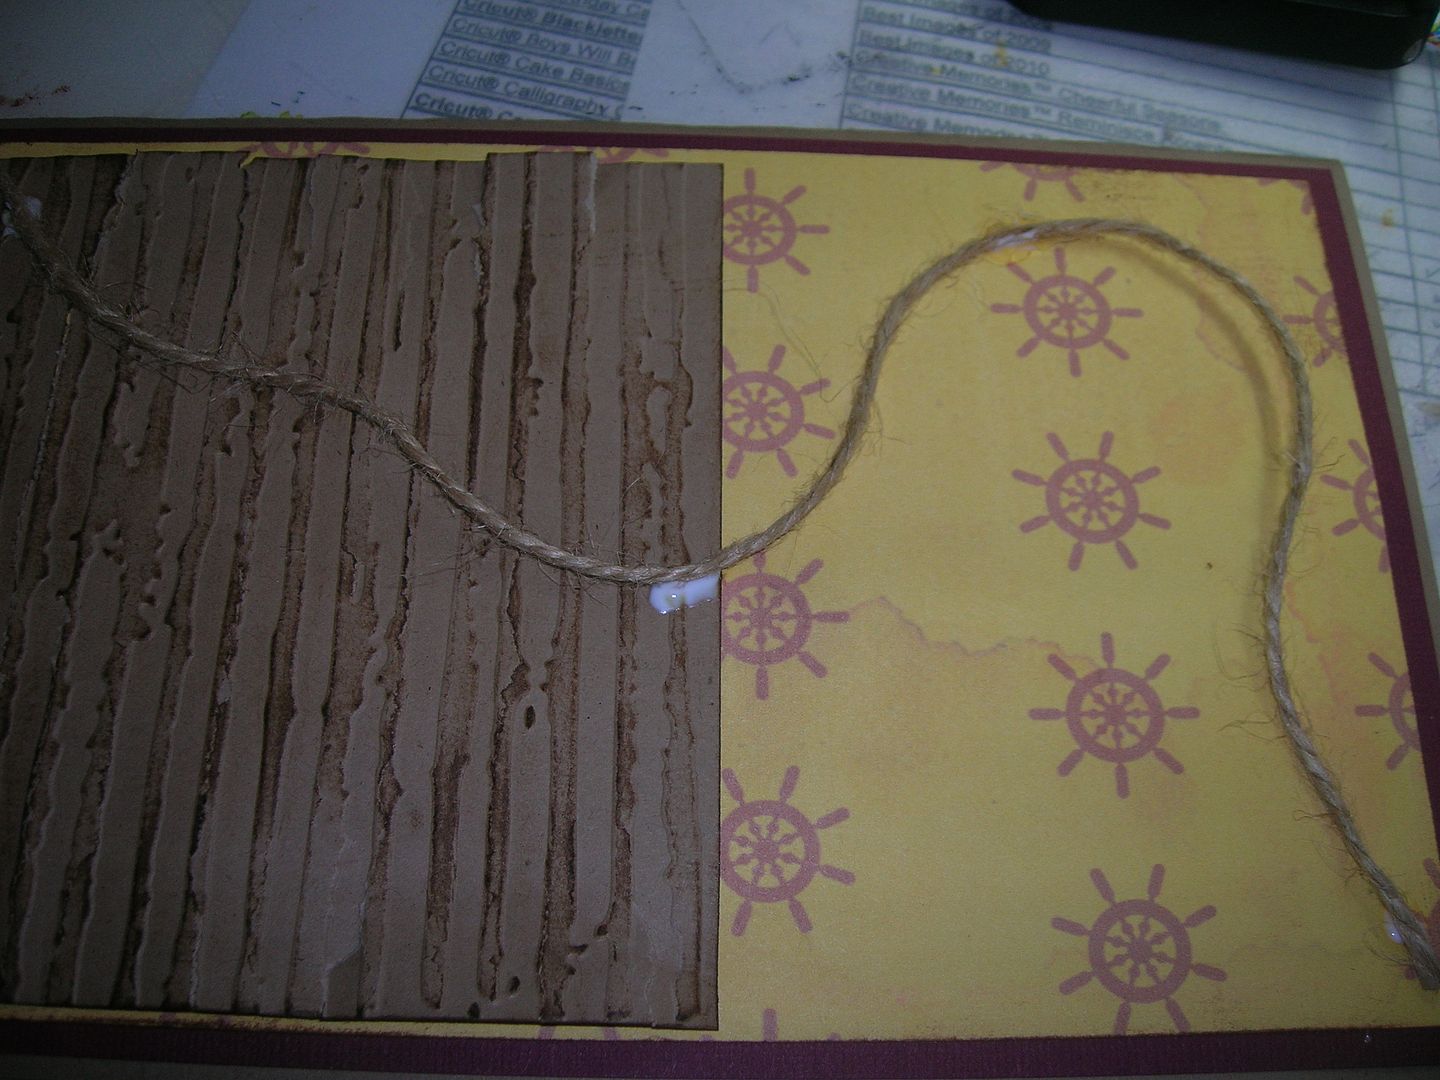
Used Distressed stripe Cuttlebug folder to distress Kraft paper

Inked and tore edges used twine
Bucaneer Cartridge
Pirate p. 3 cut at 4.5 inches-pop dotted
Parrot page 11 cut at 2.5 inches -pop dotted
Shiver me Timbers 2.5
Yo Ho Ho page 27 2.5
No Trespassing Sign page 26 3.0
separated cuts and stamped thanks ever so much
Paper page 43
Card is 8 1/2 x 11 folded in 1/2 Kraft stock
then front cut 5 1/4 x 8 1/4 burgandy
5 x 8 anchor paper from Imagine cart.
The second thank you card I made using the Imagine Yummy Cartridge
The cup is from page 7 cut at 3 1/2 inches on the front and 2 1/2 inches inside -flipped
Corner stamp EK success
Added Stickles, gems, and died seam binding ribbon
Stamps A Cup of Good Cheer from Robins Creative Cottage
Robin has her first two sets of stamps out a snowmen one and Gingerbread one so check them out.
Inside Comfort and Joy stamp from Michaels
Karen Foster paper Merry Mugs
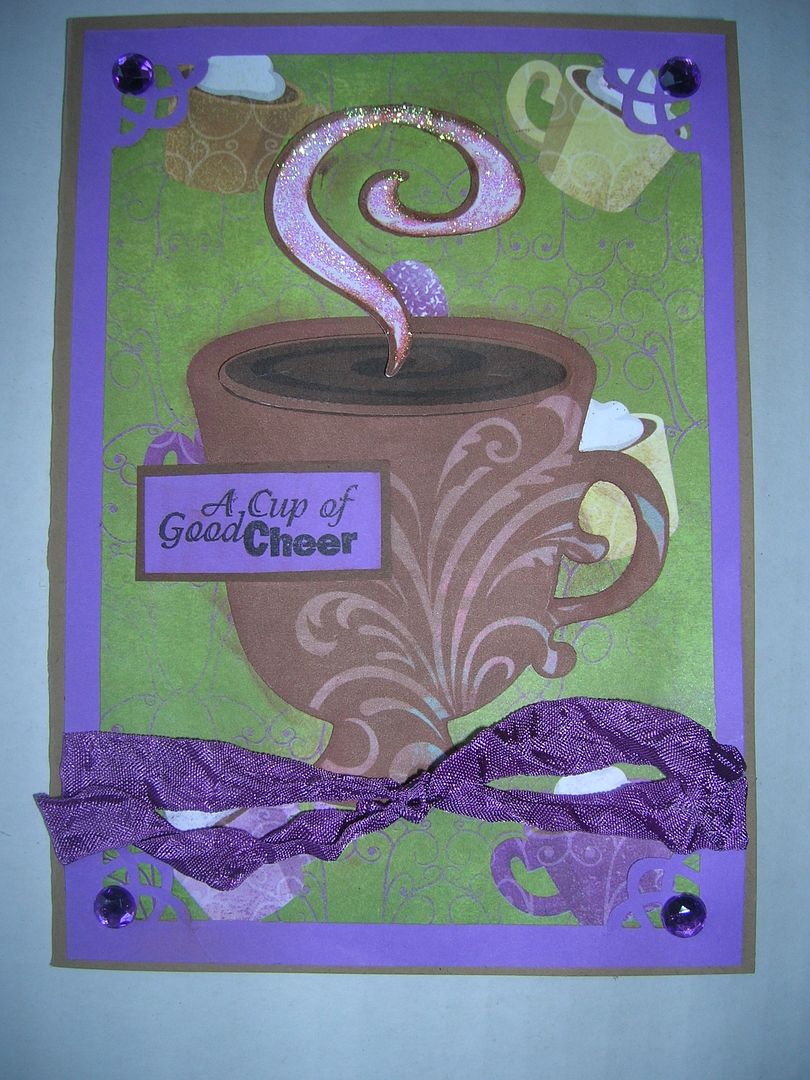
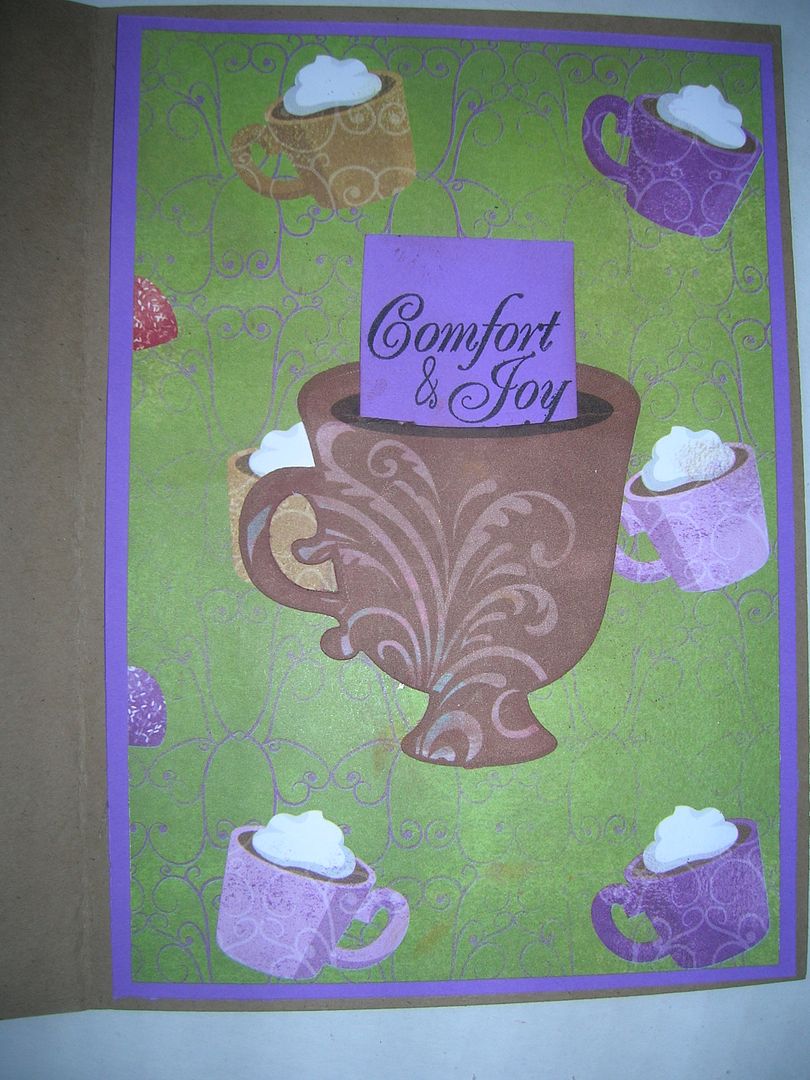
I cut a slit with exacto and placed sentiment inside.
I hope you will come back all week to see what the other DT members design for Thank yous. Thanks for stopping by and I would love to read your comments.
Sunday, December 25, 2011
Who says pictures are easy?
Have you ever tried to get a picture of three kids under the age of 2 at once? With the results of two cameras this is the best shot of all three girls. Hopefully camera number three got some good pics. I love some of the progression to get this one picture and I thought you all might get a kick out of it too.
So this is the best one of the three girls so far- Brittany 5 months, Kenzie 13 months and Katie 23 months. 
Katie who usually loves to pose for pics wants nothing to do with the whole thing.

Kenzie who is now walking says forget it I am not sticking around here.

So then we tried the big green chair. Not much better!

So here sits Brittany the youngest posing with her new owl hat that auntie made her.

Merry Christmas to all of you.
Saturday, December 24, 2011
Merry Christmas to all
The house is decorated, the shopping done and the presents are wrapped. Today my family all gathers to go to Christmas Eve services. I love it when we are all together and celebrating the real meaning of Christmas the birth of our precious savior Jesus Christ. I want to wish all my followers and crafty friends a wonderful Christmas and a Happy crafty 2012, I hope you have wonderful time with your families and friends. I am so blessed to have three beautiful granddaughters to share Christmas with. I know two of them will have a blast opening presents this year and the other is a little young still. I can't wait to see their shining eyes. So God Bless You All and Merry Christmas.
Oh this is my tree this year which is all bears. It is usually taller but we forgot a section so left it off. On the table is a pic of hubs and I when we got married Dec. 26th 18 years ago ago with my daughters as my attendants right in this very room.

Friday, December 23, 2011
Quick Quotes layouts from Scrapbook Expo
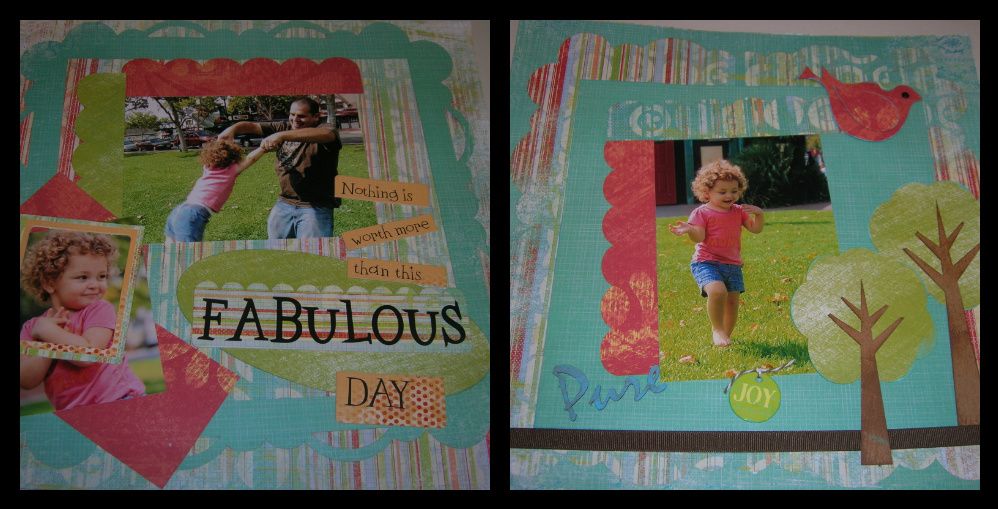
I had the opportunity to take several classes at the Scrapbook Expo in Ontario recently. I was lucky enough to take a class with Lisa of Blog Quick Quotes. I finally was able to get the pictures in the pages and get the layouts finished up. I love the colors of the paper pack which is called the Kids Explosion pack. I couldn't wait to get these pictures developed of my oldest grand daughter Katie playing with her dad at the park. Her shirt and the grass matched the color of the papers perfectly.
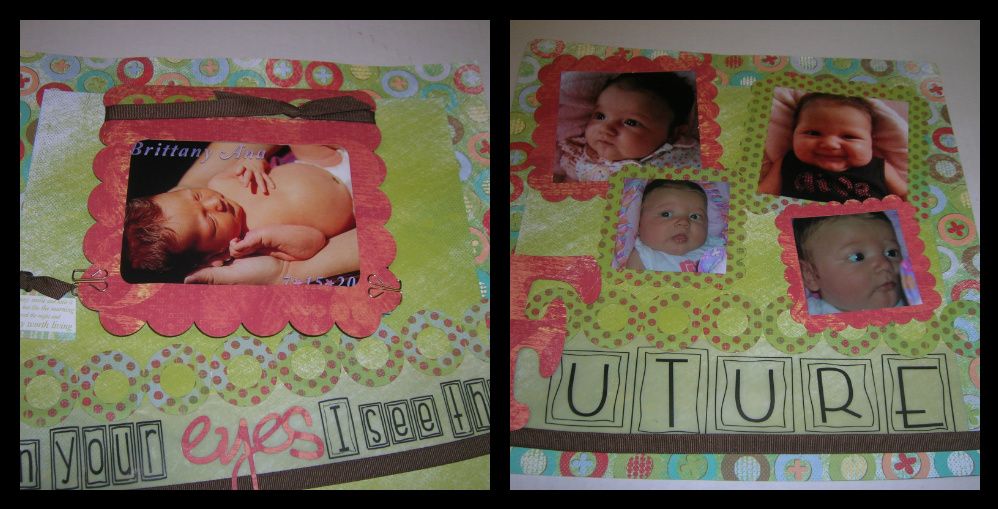
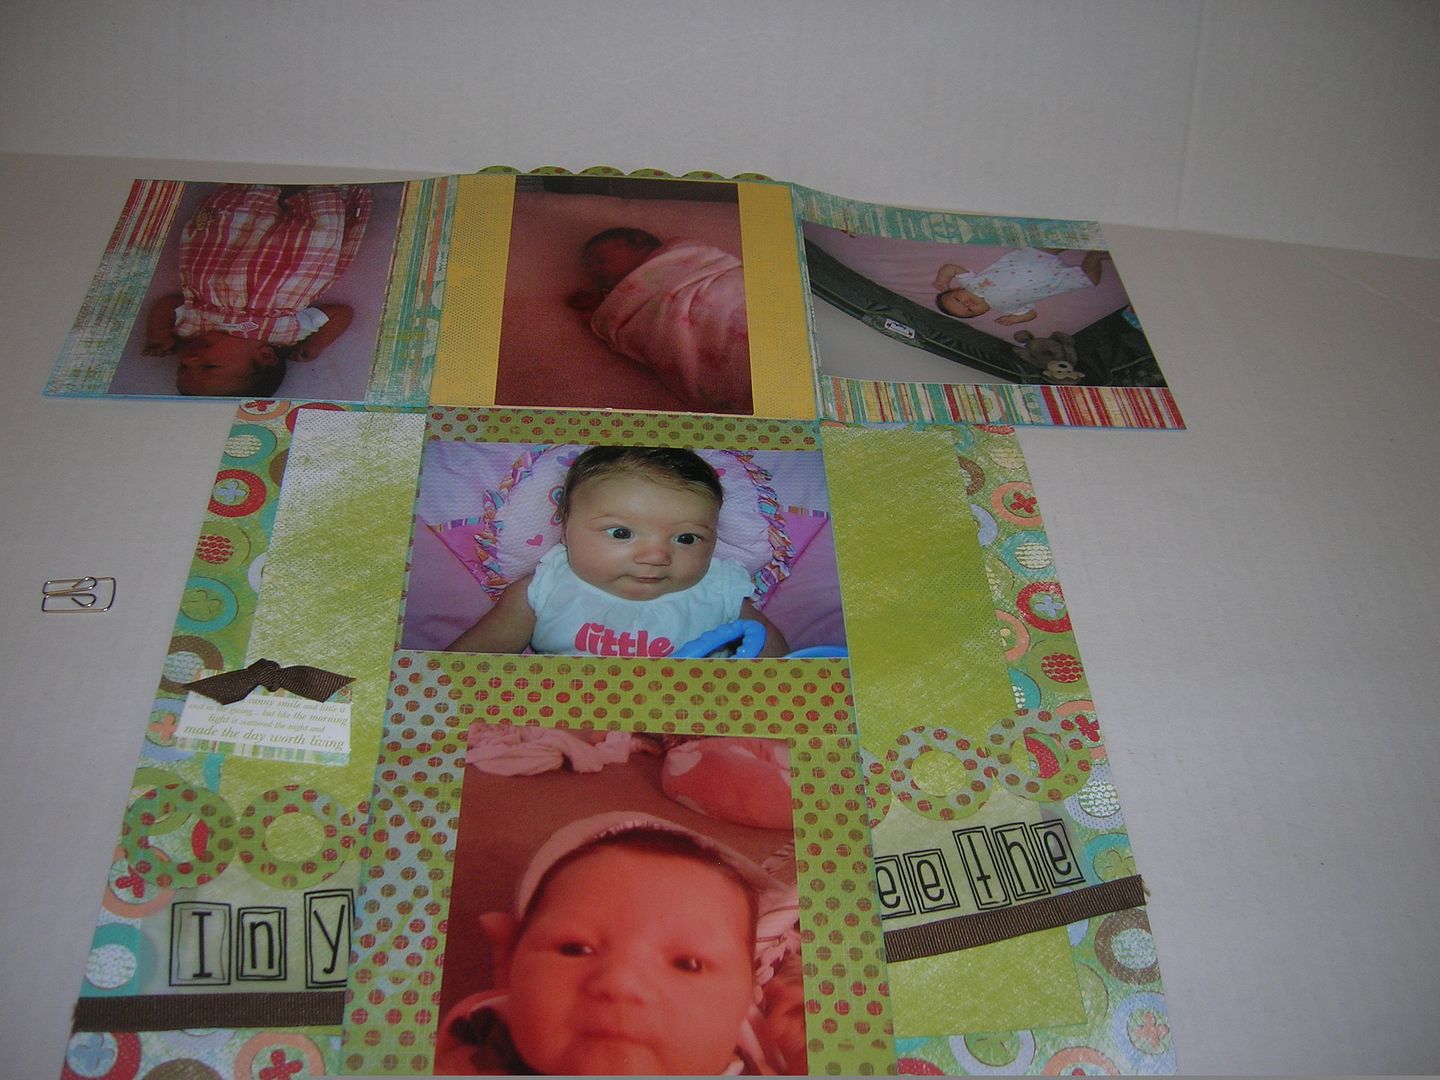
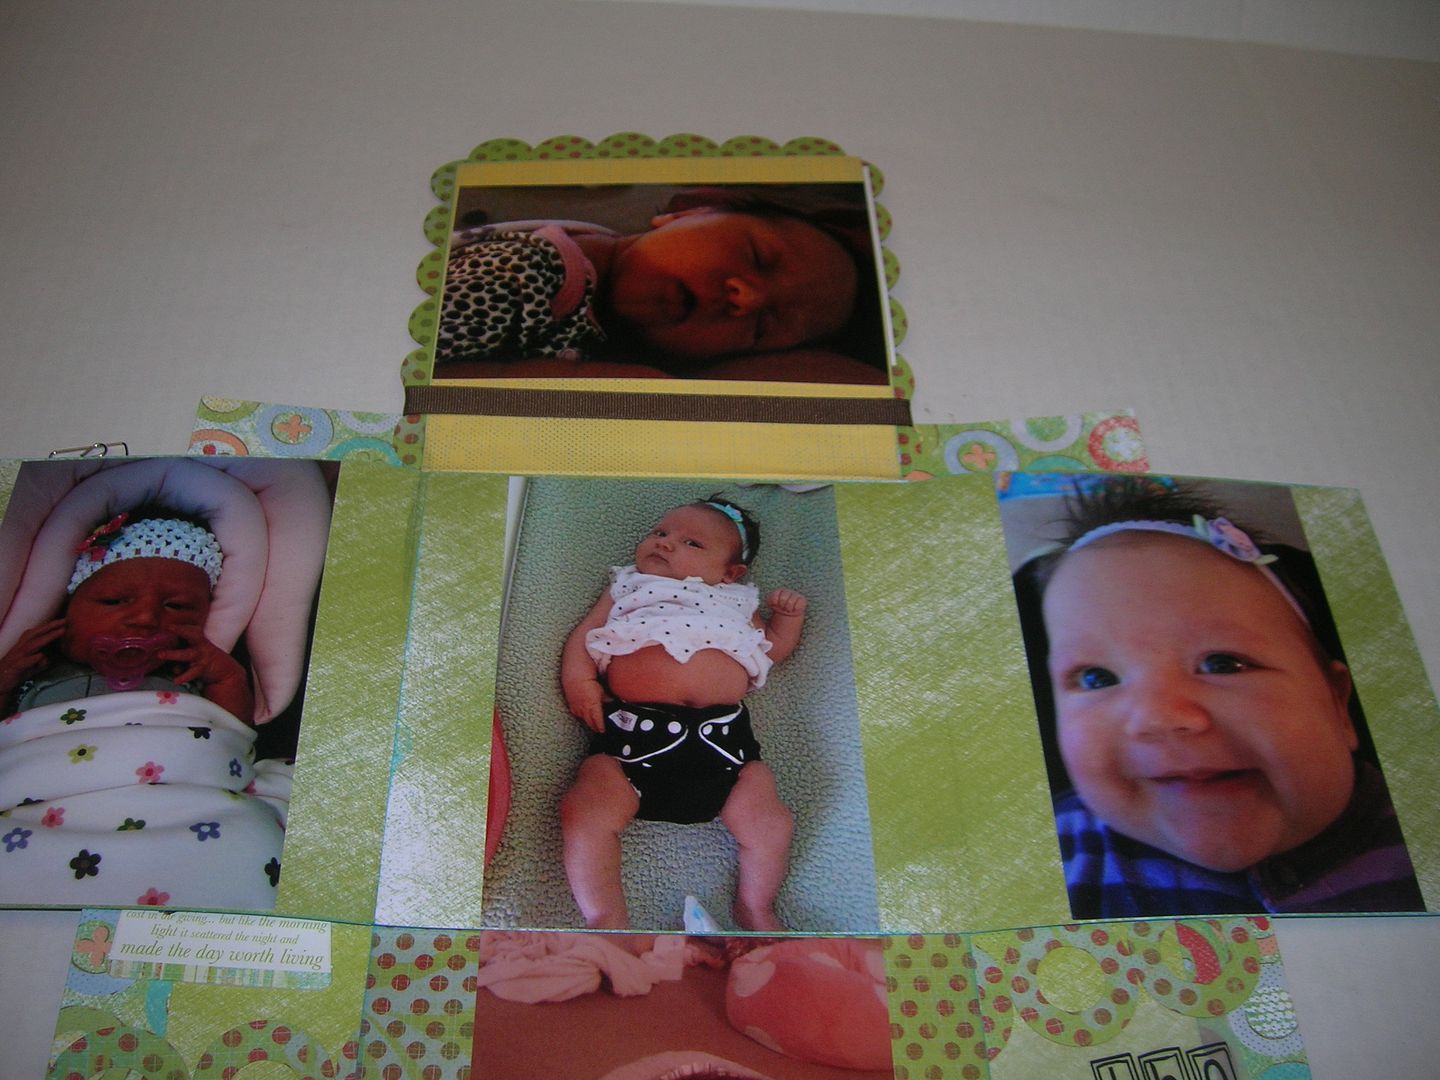
The other layout we made was In Your Eyes I see the Future- I used these pages for my newest granddaughter Brittany. There are 4 pictures on this page and the first page actually is a flip out book which holds 10 pictures total. That is 14 pics on two pages. How amazing is that.
Here is the link to the Quick Quotes website. By the way their chalks are absolutely amazing for inking edges and chipboard.
Here are pics of pages open.
I also did a layout for a Blog Quick Quotes challenge at the end of November. The paper I used here is called Living Out Loud. The challenge was to make a layout with white space following a sketch. Here is the layout for the challenge.

Here is the completed two page layout. For the original page I added two more pictures and made a page to go with it. The butterflies, leaf ribbon and flowers were in my stash and I thought went together beautifully.

I just love the vibrant colors and how well all the papers work together.
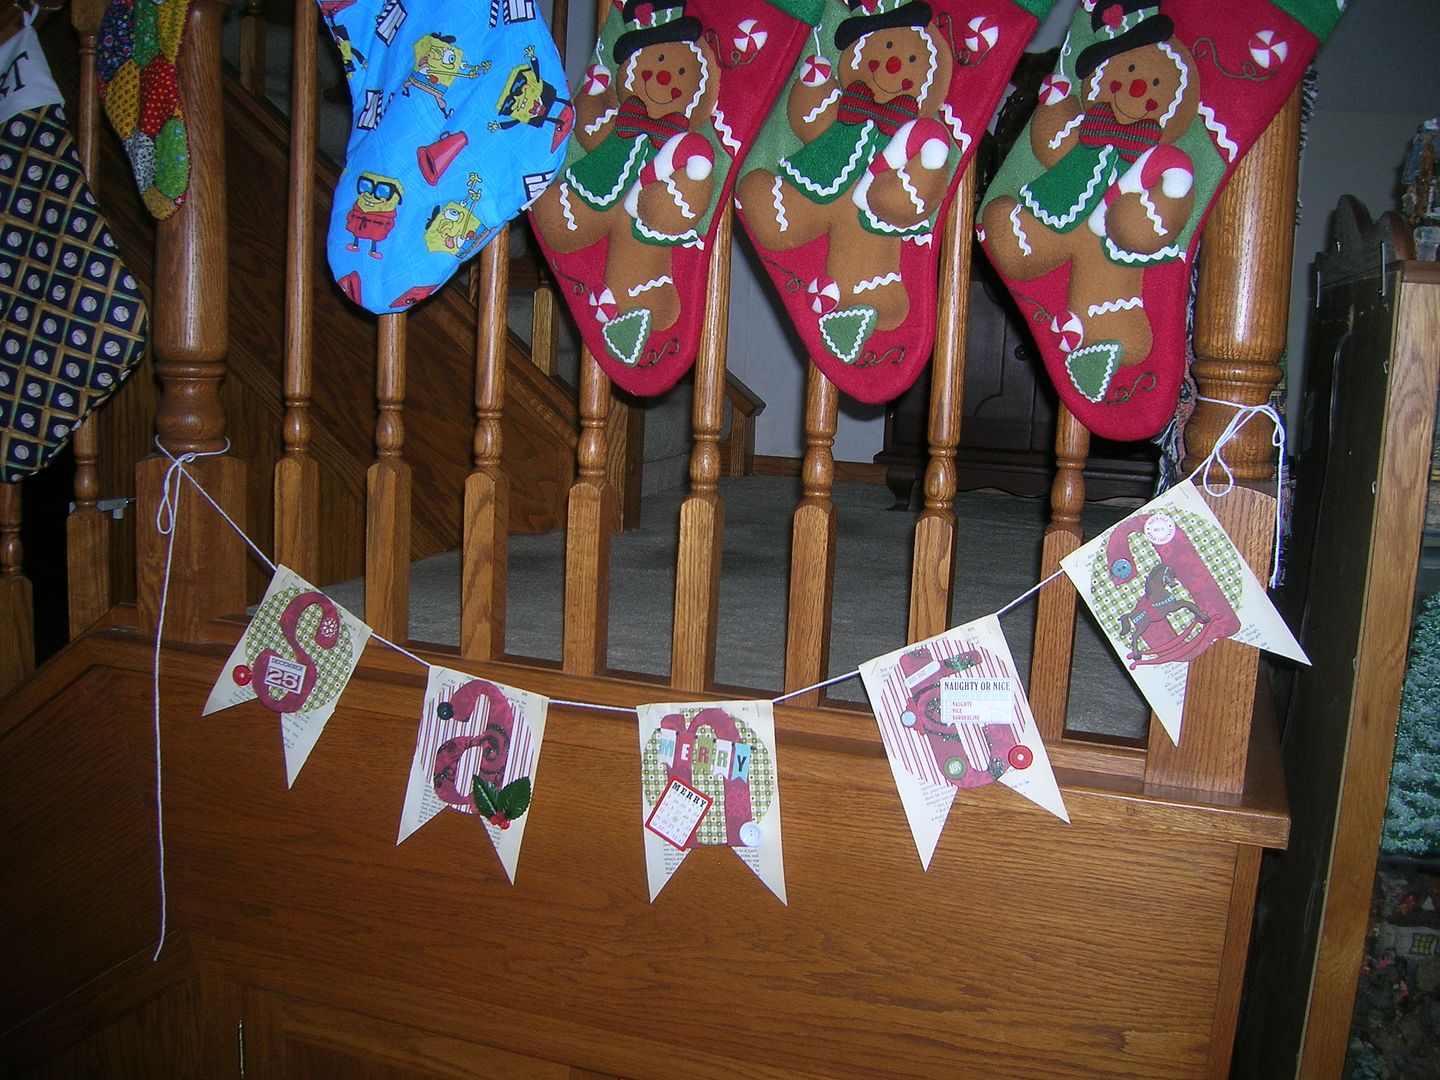
Banner and layouts with Echo Park paper
Yesterday I shared the Christmas house I decorated at a class at my local scrapbook store. We received a packet of Echo Park Christmas paper and embellishments. After we finished the house we made banners from pages out of a book. Sure missed my Cricut when I had to cut the letters out my hand but I love the way the book pages look.
After that we took the left over pieces to make singe page Christmas layouts. These are the 3 pages on the left. I was able to come home and make pages to go with them so I have double page layouts.
For this one black background paper and doilies were added to the Echo Park paper.
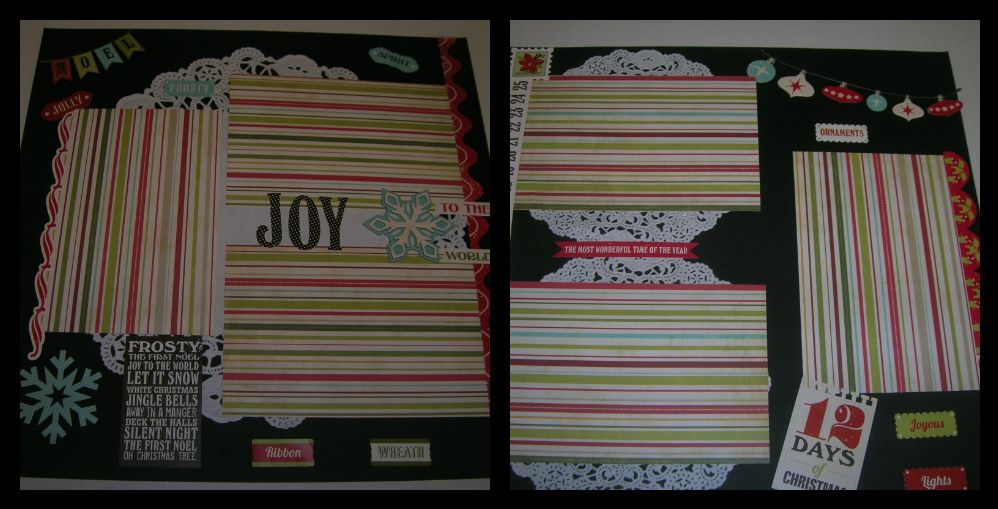
For this one I found some green paper in my stash that matched closely.
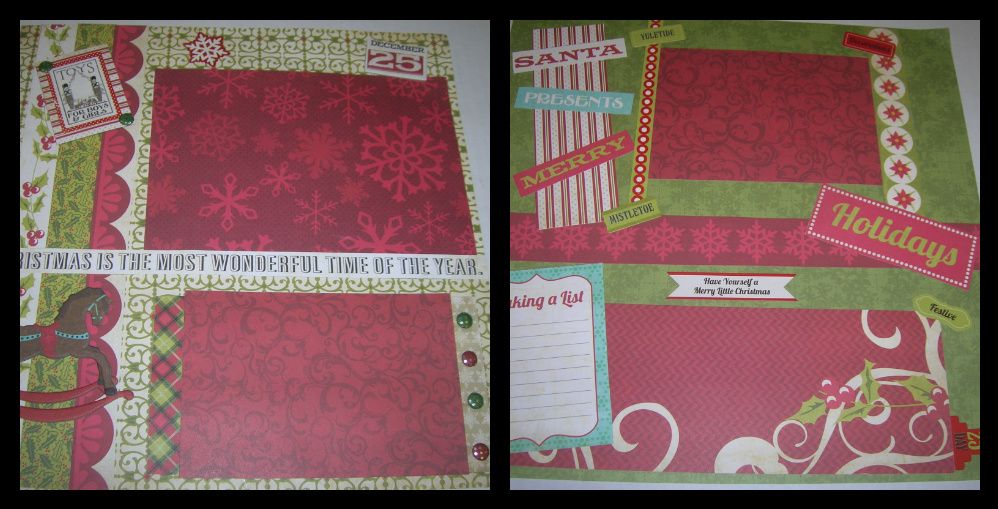
I bought a blue piece and tan piece of cardstock to complete this layout. I also added a sheet of Graphic 45 Christmas Emporium paper to the right to go with left side.
Thursday, December 22, 2011
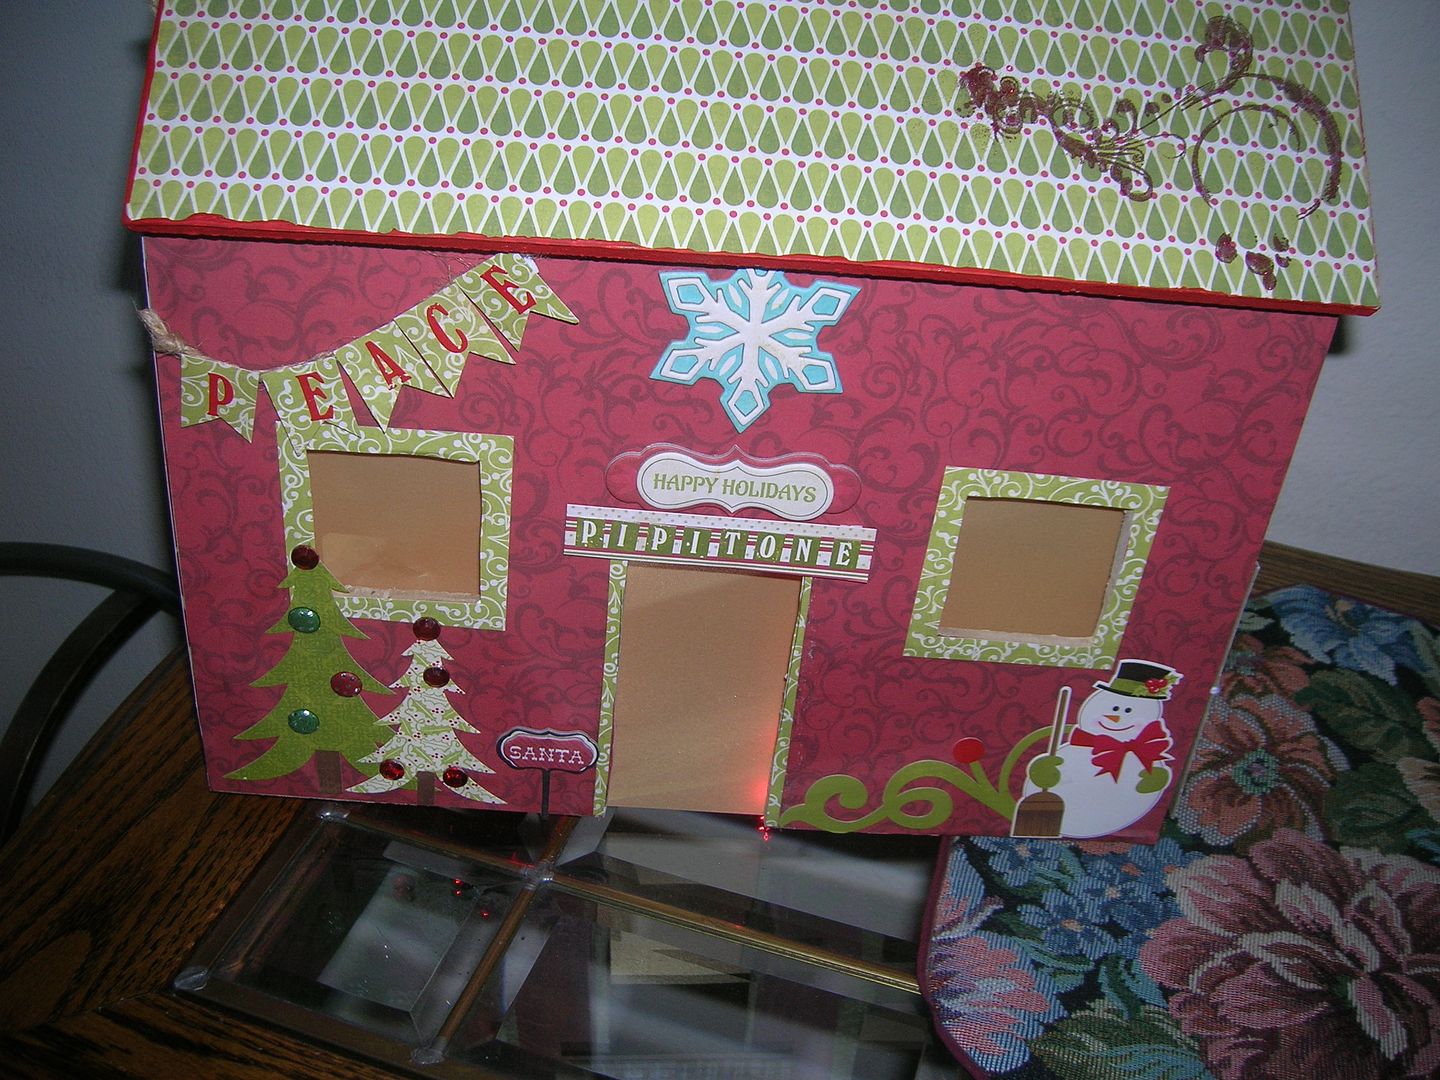
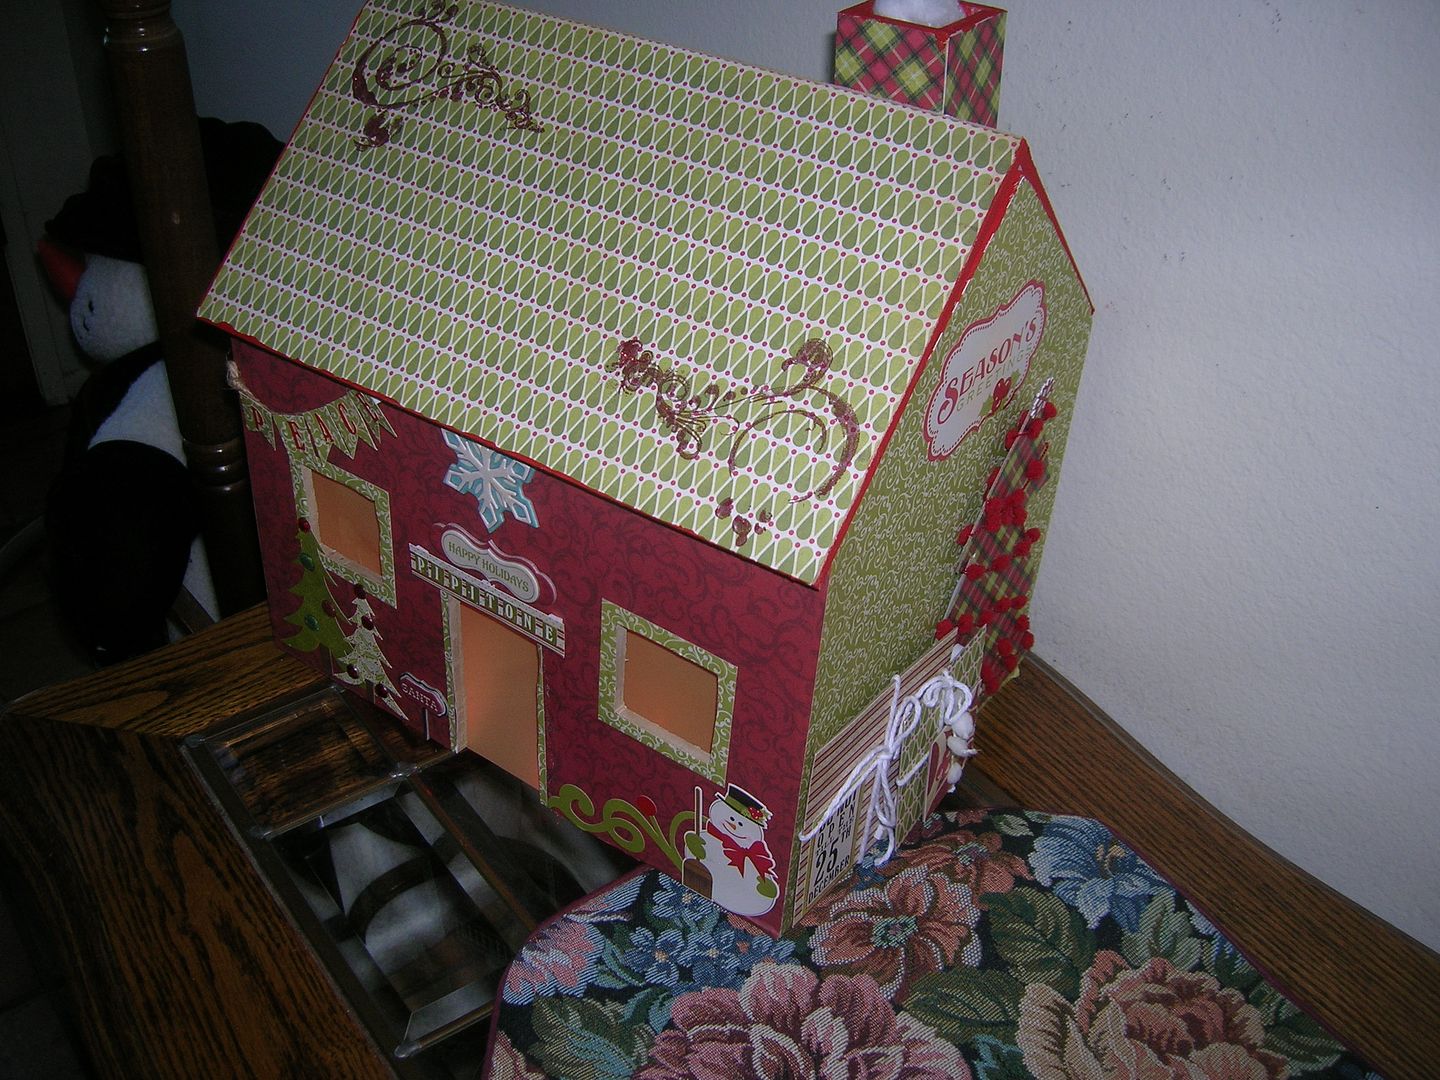
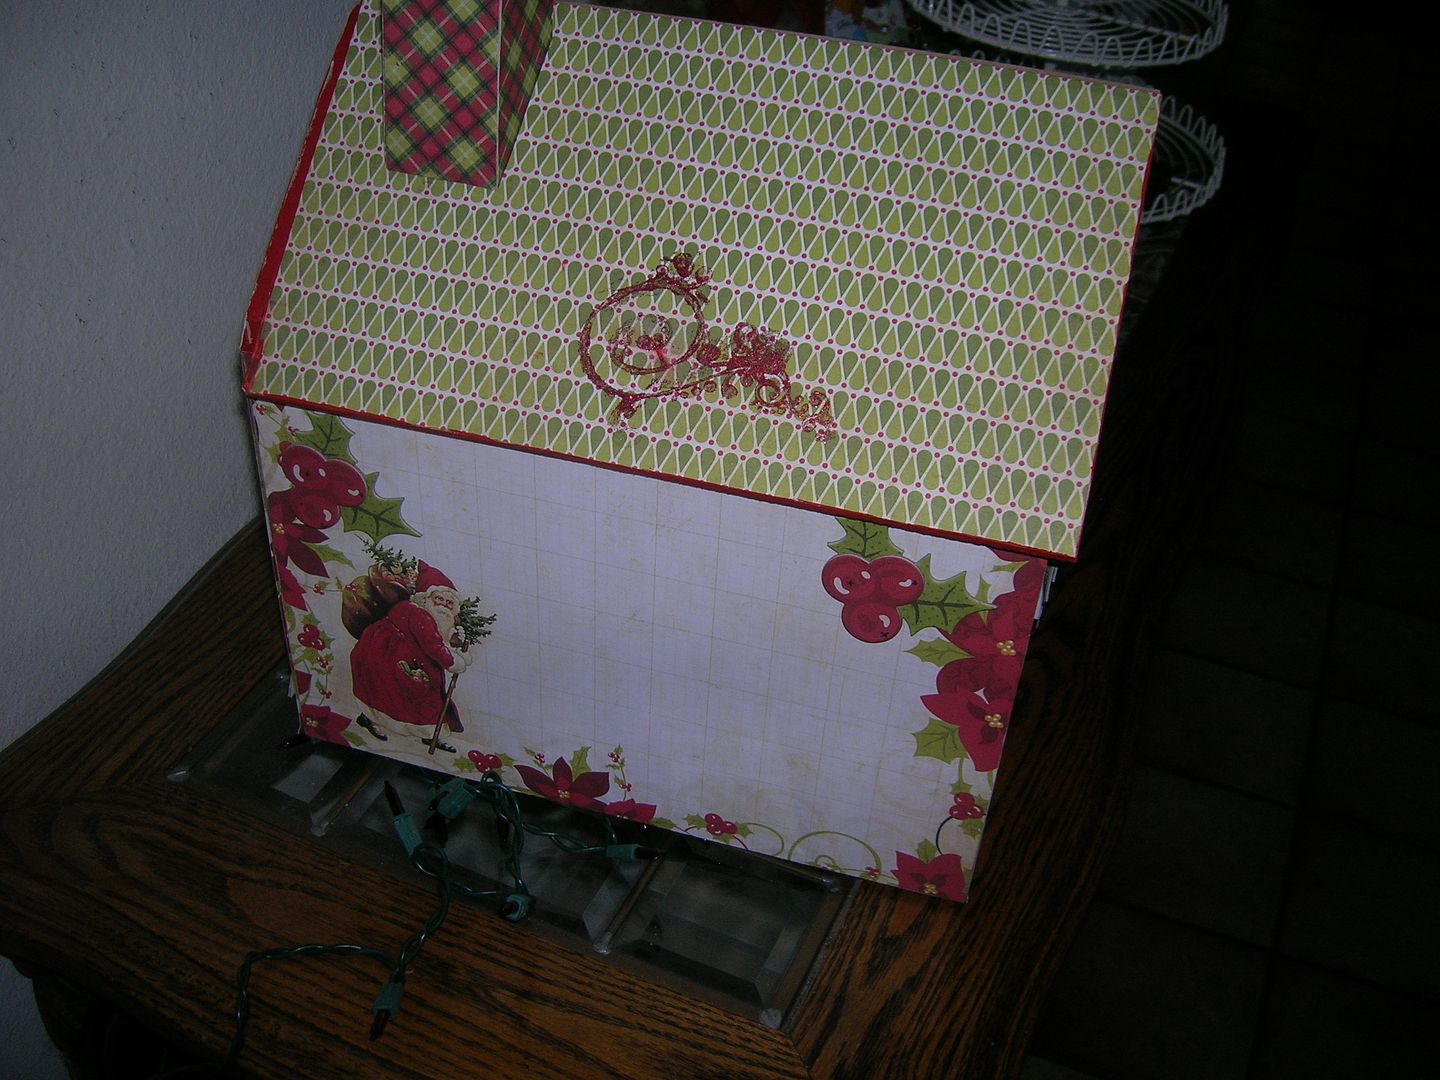
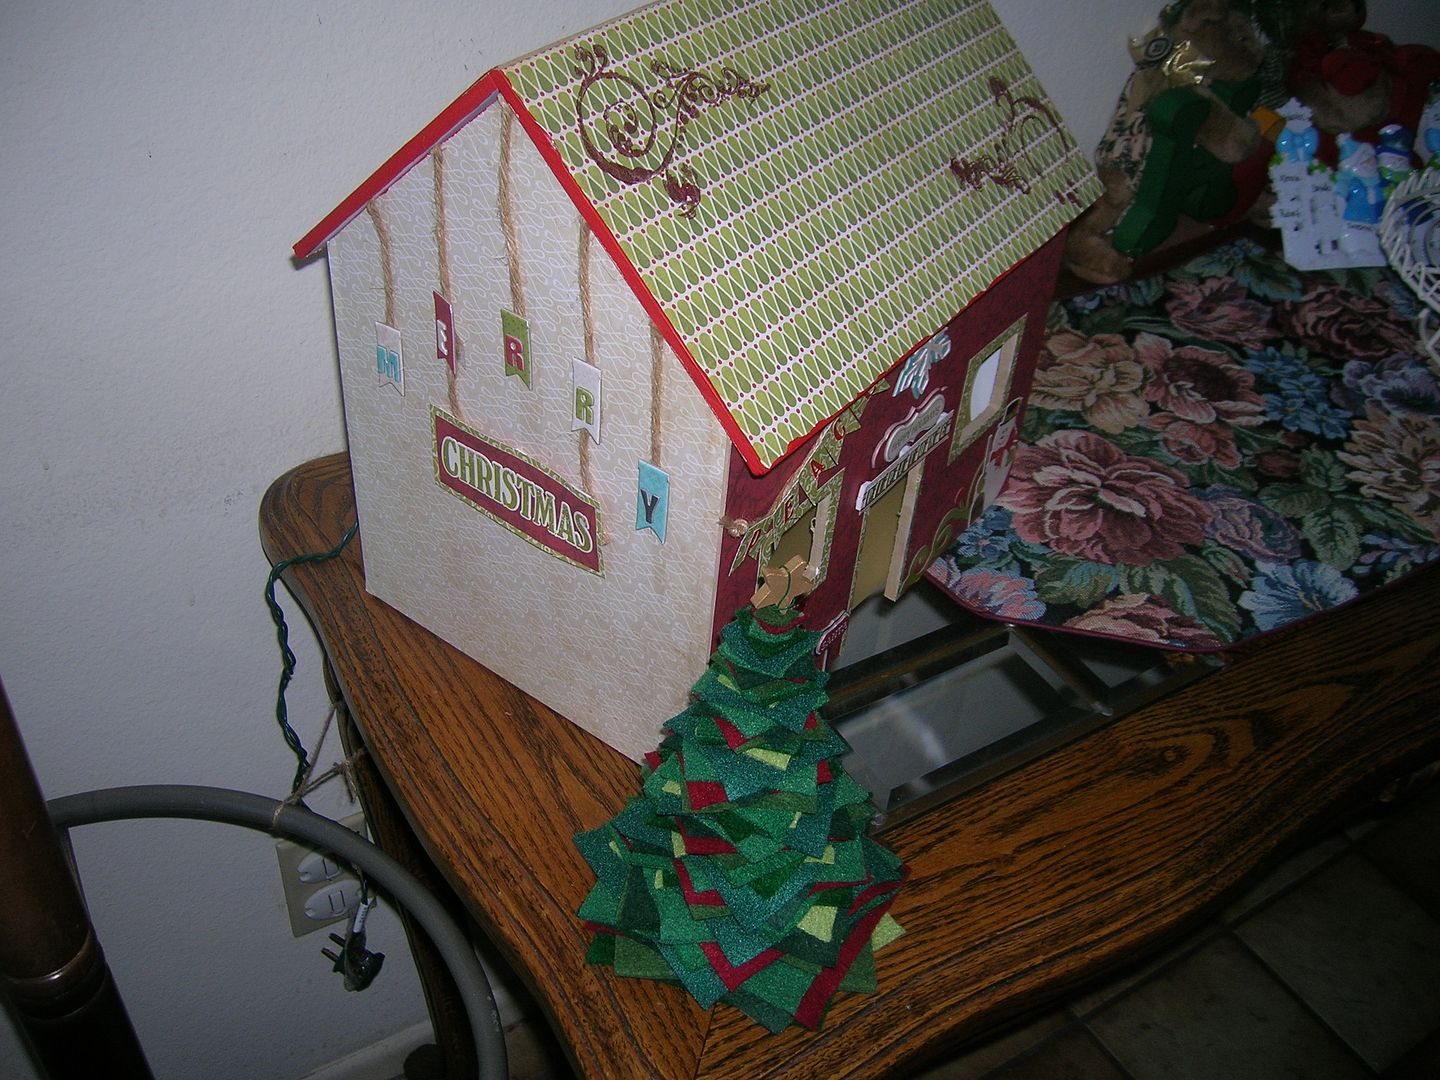
Christmas house I made at LSS class with Lance Anderson
Over the weekend I had the opportunity to take 4 different classes at my local scrapbook store. The classes were taught by Lance Anderson who used to have the "Rusty Pickle" paper line. This is one of the classes I took. The first part was to decorate this Christmas house using Echo Park paper. The house was premade out of press board.
This is the front. I covered the windows and door with goldish vellum. There are red lights inside and I wanted the glow but didn't want them to show. I love my house and it was so fun decorating it. Tomorrow I will share a banner and some layouts I did with the rest of the Echo Park paper.
Entire house and one side
Back
Other side
Tuesday, December 20, 2011
Sweet Sassy Diva "Let it Snow" Design Team Project
Hello Sweet Sassy Diva followers and a Merry Christmas and Happy Holidays to you. This week the challenge is "Let it Snow". I tell you when I see all the beautiful pictures of snow my fellow crafters post I am a little jealous but I think I will stick with my Southern California weather. That doesn't mean I don't love to pretend and make layouts of snow, snowflakes, and snowmen.
This is a fairly simple double page layout where I highlighted the paper which I had been saving from last year. I loved the light blue with a touch of green and white snowflakes.
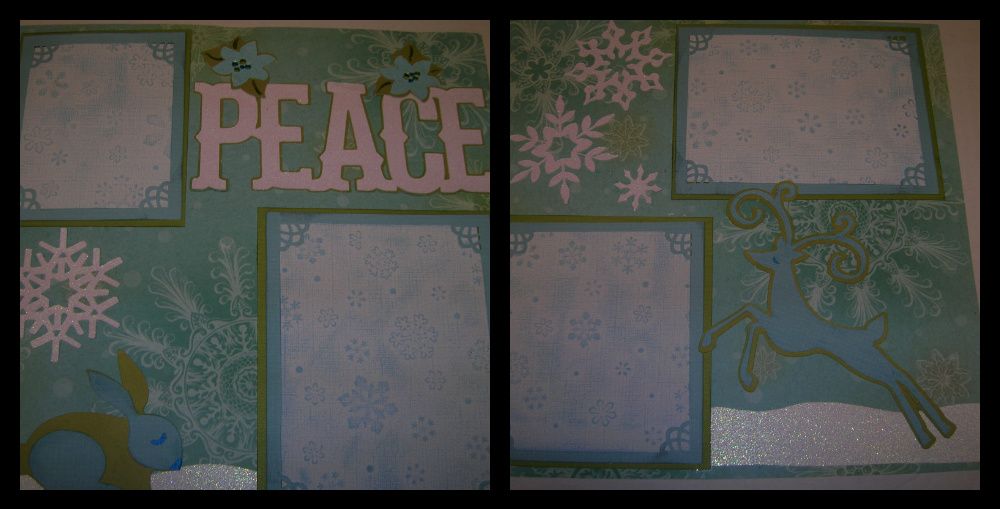
Recipe:
Art Philosophy
Snowflakes cut at 3" white glitter paper page 22, 27 and 30
Winter Woodland
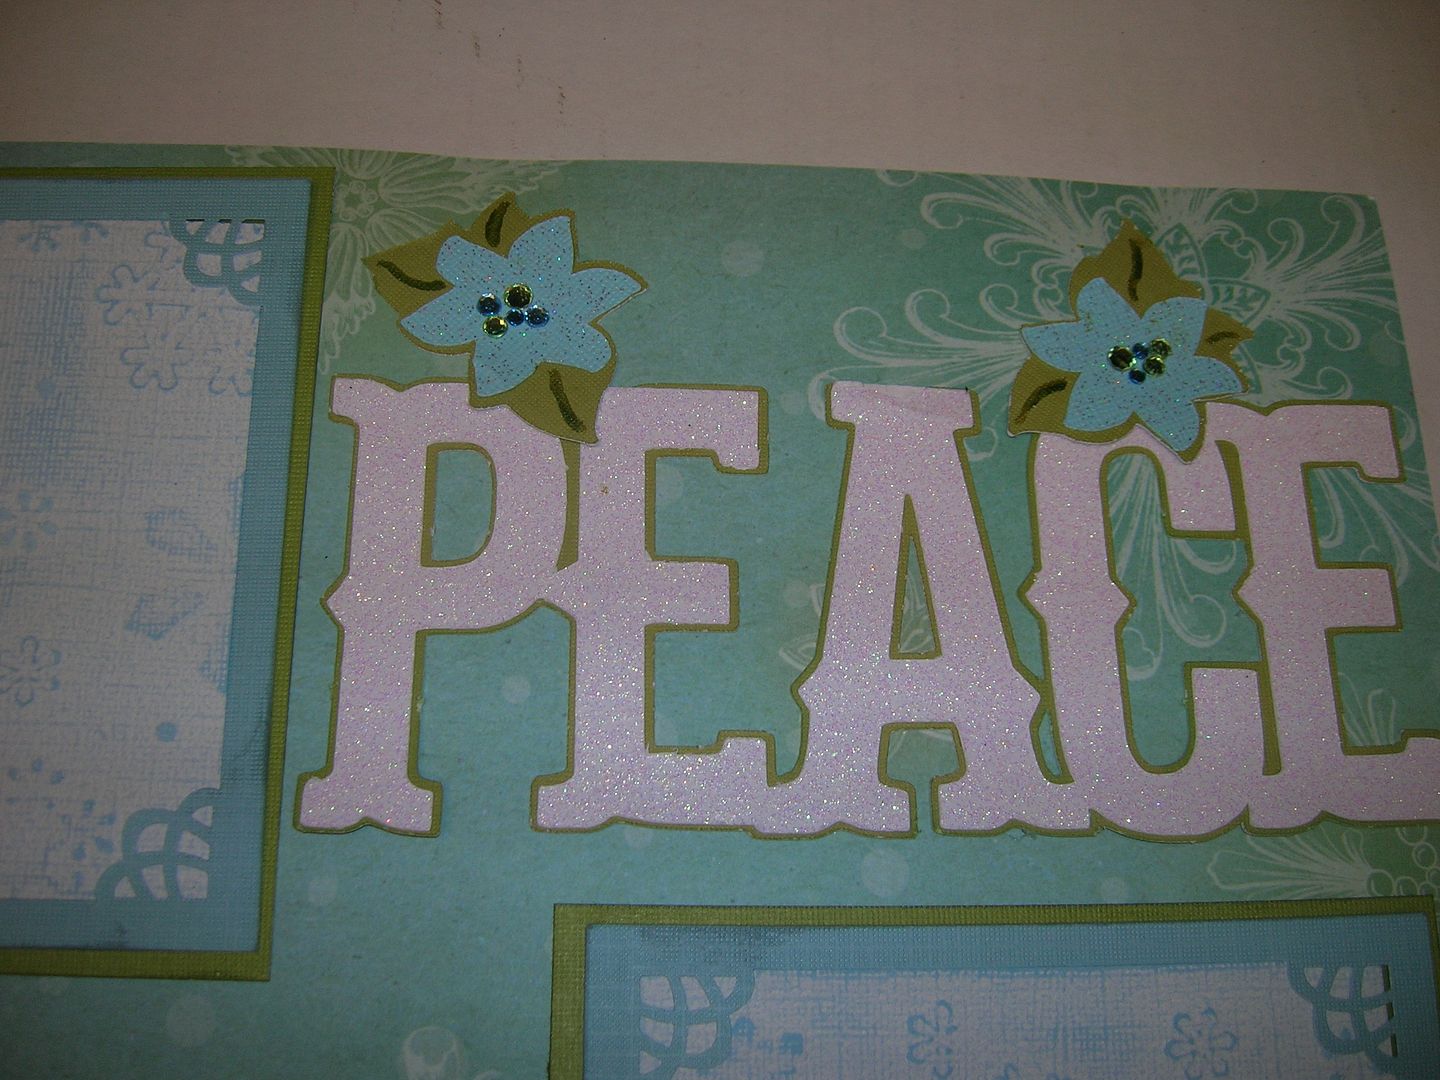
Peace cut at 3 "- page 64 white glitter paper and green Bazzil
flowers on Peace cut at 2 " page 64 green and lt. blue Bazzil
Rabbit page 58 cut at 3" green and lt. blue Bazzil
Deer page 55 flipped and cut at 6 '' lt. blue and green
Mats
White inner mat cut from Recollections pre-embossed core paper and sanded
2 cut at 4 x 6, 1 cut at 4 x 5, 1 cut at 3 1/2 x 4 1/2
Cut blue mats 1/2 inch bigger all sides and punches corners with EK sucess corner punch
Green mats cut 1/4 " bigger than blue
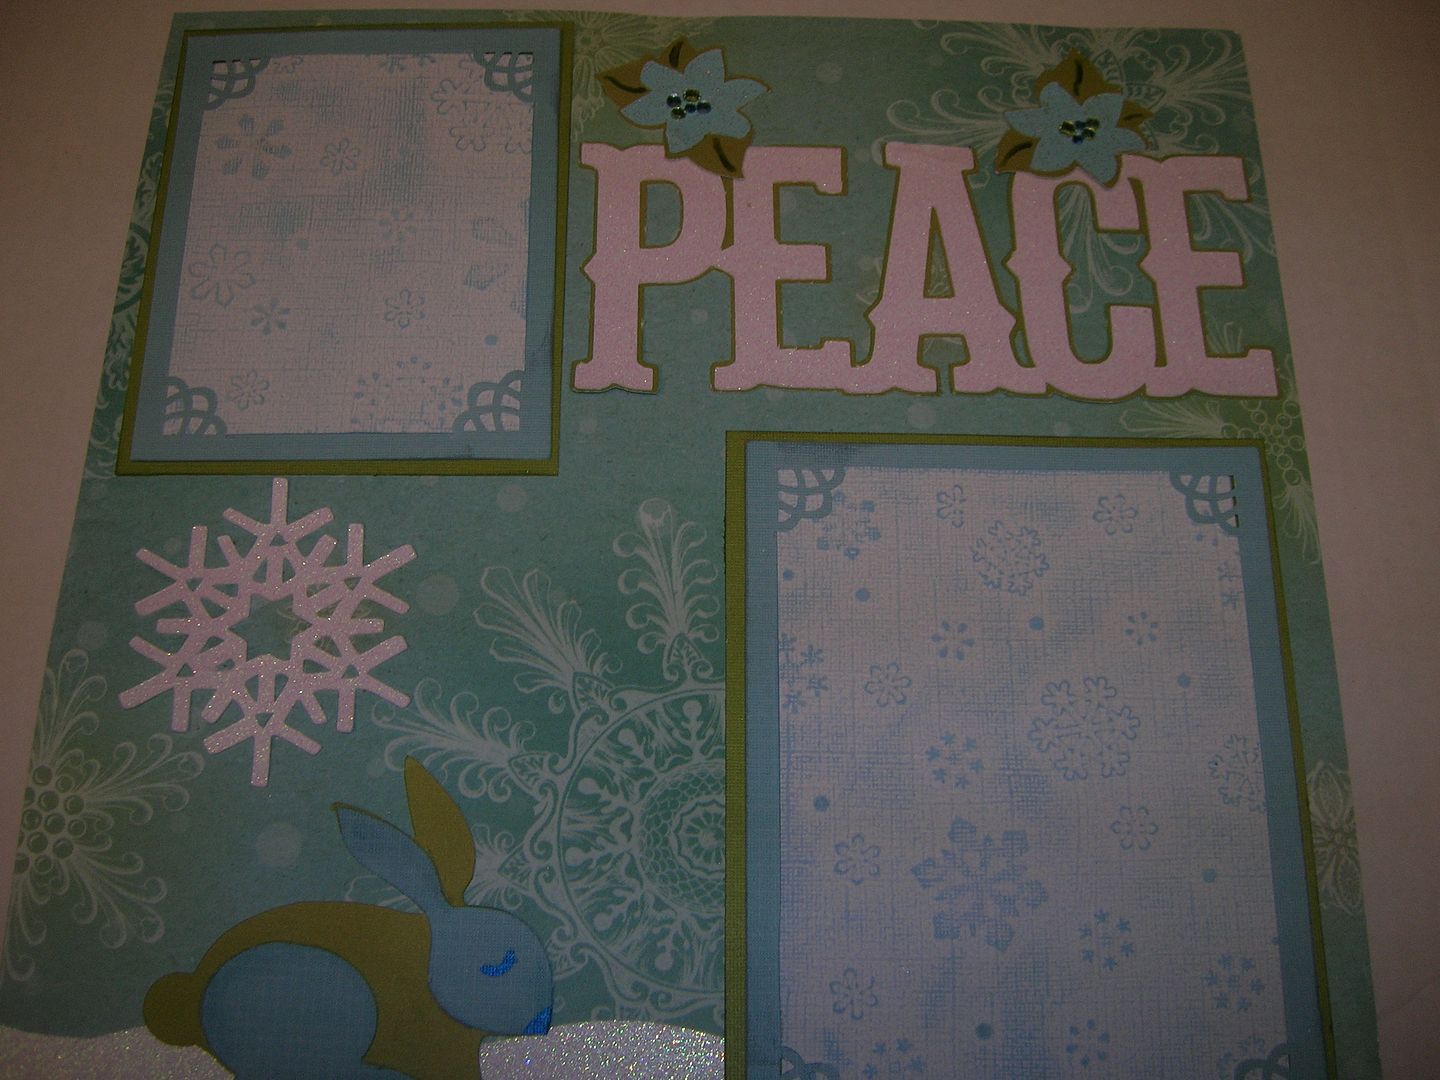
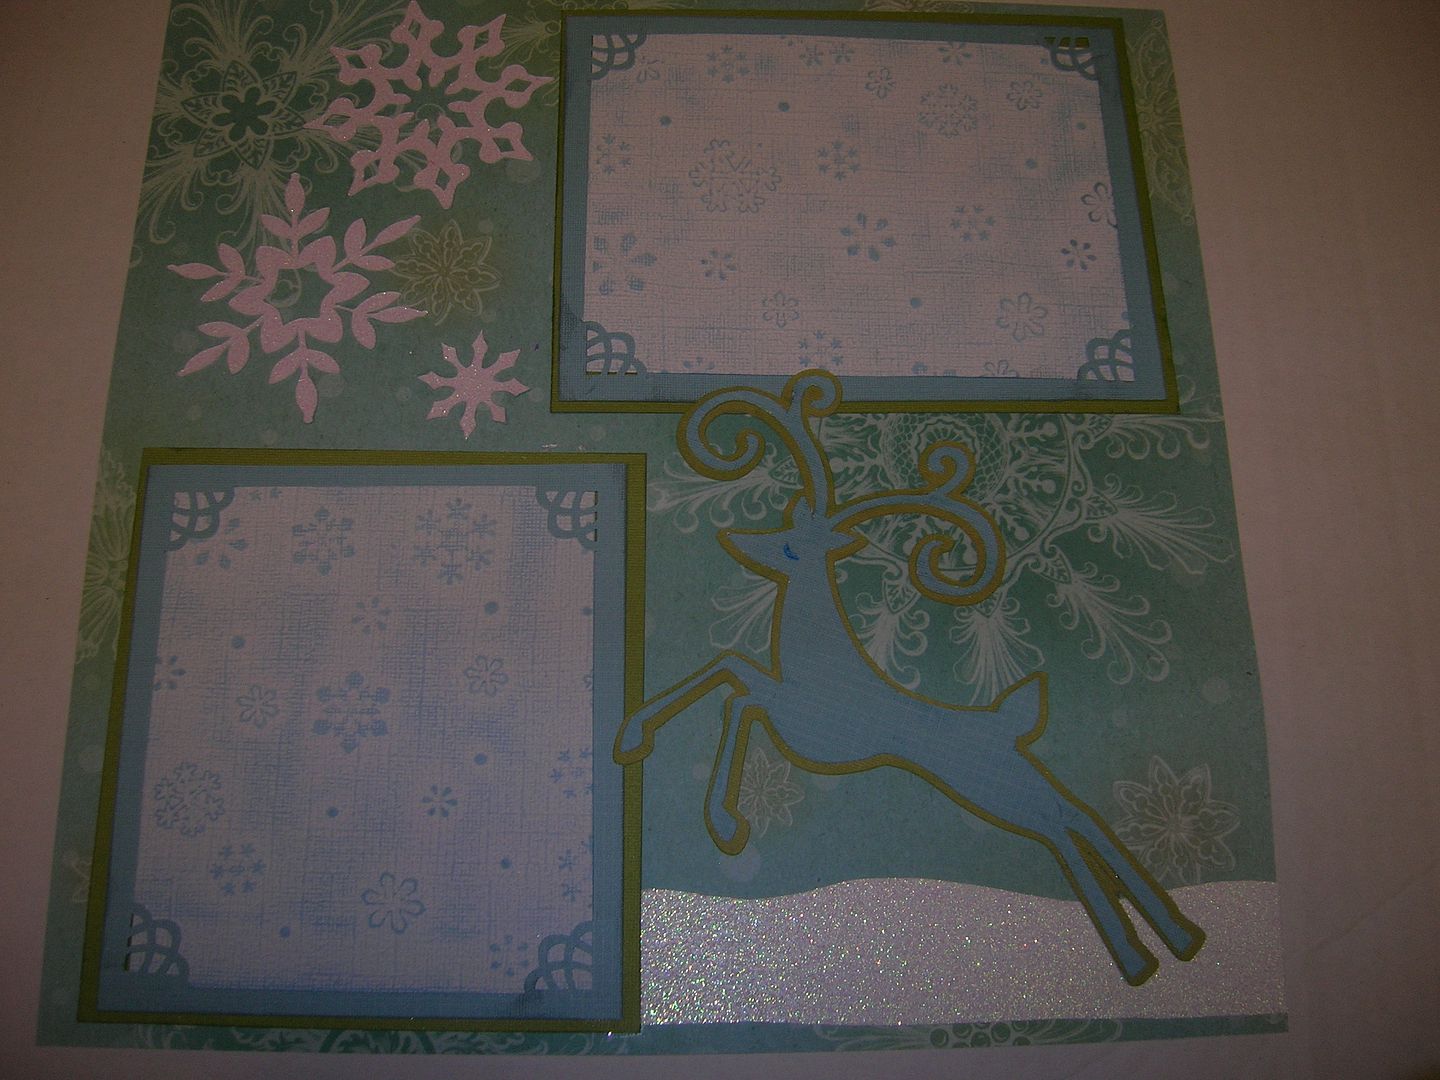
I added some tiny gems to the flowers and Smooch ink
to leaves and eyes on deer and rabbit.
Hope you enjoyed the layout. Please come back all week to see what all the designers have made.
Wishing you all Happy Holidays and Happy Craftin
Also posting at the Paper Playtime- Anything Goes with a Sentiment
Sunday, December 18, 2011
Winter Frolic Ornament for Cricut Circle Challenge
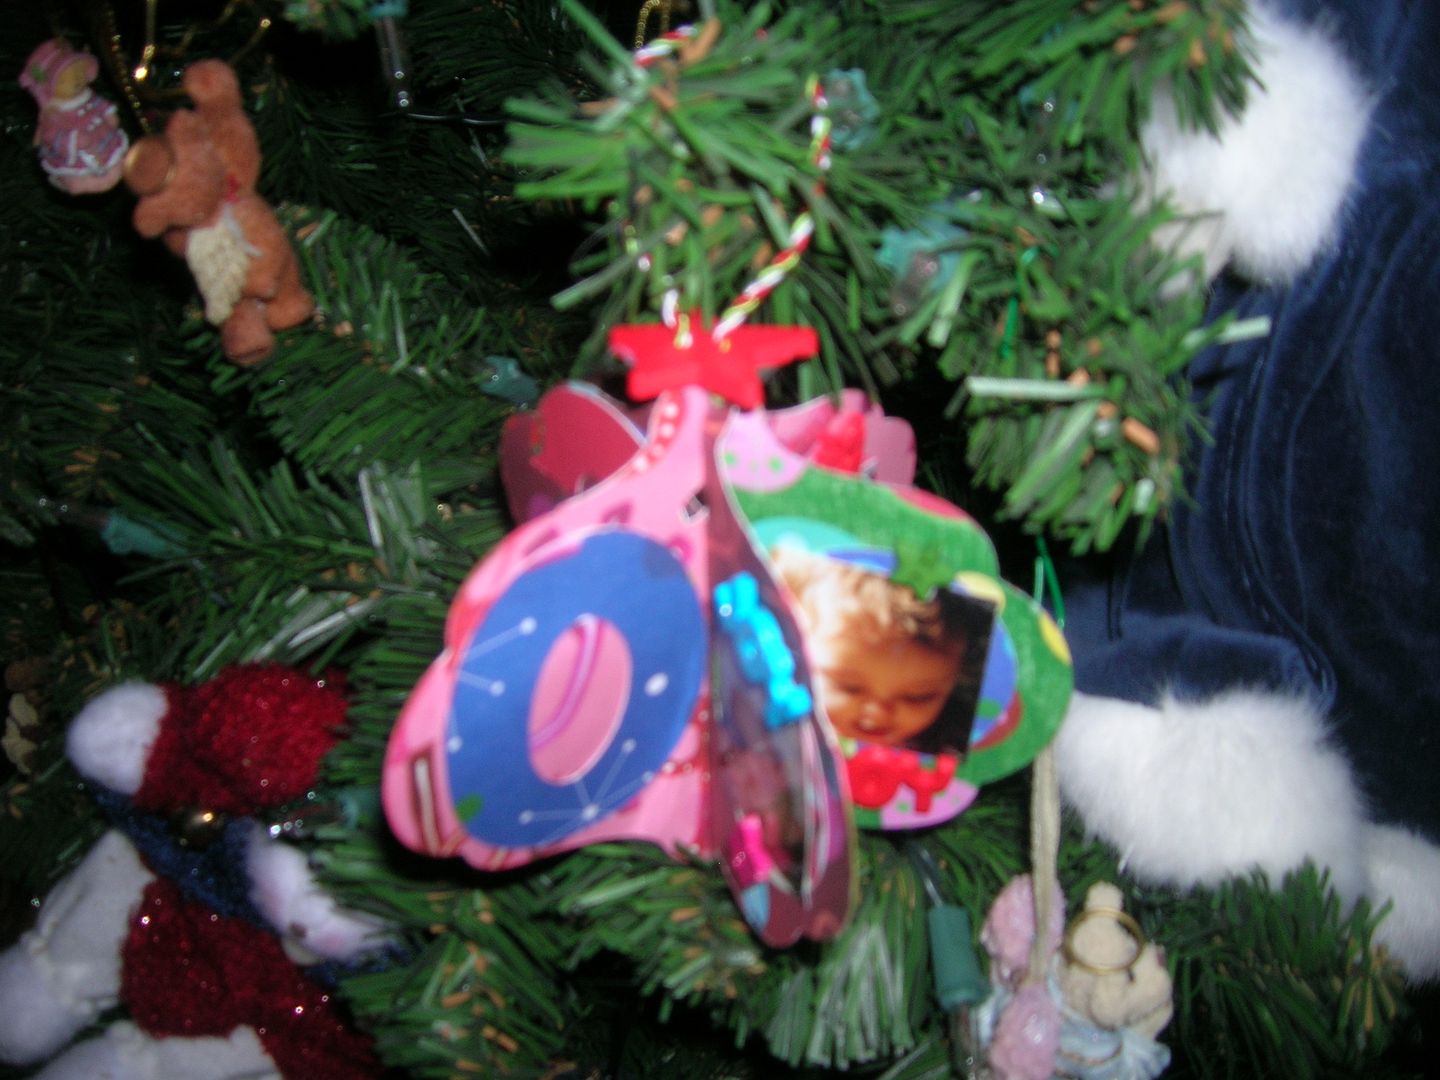
Cricut Circle Weekly Challenge- Make an ornament with 2 Cricut cuts. I used an ornament cut from Winter Frolic cut at 4 inches. I cut slits and fitted 3 of these together. I added Cricut cut numbers 2010 for last year (sorry I don't remember which cart) and pictures of two oldest granddaughters since this was their first Christmas. T his year I will make a 2011 one for youngest daughter. Also cut out with Cricut words 1st Christmas. Added package, star and joy buttons to decorate. This was all made of scraps.

Subscribe to:
Posts (Atom)